PagesPat's Ponderings

Showing posts with label QKD. Show all posts

Tuesday, July 1, 2025

Gathering Quite a Pile of Halloween Cards


Here's my newest Halloween card for the "Halloween & Other Occasions Challenge blog. If you're looking for a cool way to have a stack of cards ready for a holiday, choose a challenge blog and enter a card each month with the same theme, like Halloween for HOOC . There are several Christmas challenge blogs as well!!

My card today features a stamp from Queen Kat Designs. She no longer offers stamps, but has renewed her inventory to include crocheted animals and "Adults ONLY" coloring books. Look her up on Amazon.

Meanwhile, I used a few die-cuts I found while organizing my craft supplies. using one to frame the stamped image. I used an old punch on the corners of my cards The witch is a puffy embellishment I found on my basement floor while packing away Halloween for the year! 
The rest is cardstock and patterned paper. I hand-printed the greeting on the front, as well as the sentiment on the inside that reads:
 "Don't wait dinner on me. Traffic is a nightmare."


Wednesday, June 11, 2014

Grad Parties Galore!

June is the month of closure for many--saying goodbye to school friends, cleaning out lockers, moving back home...
And then again, it's the month for new beginnings--taking a summer course so that you're not totally clueless navigating the high school halls come the Fall, moving back home, applying and interviewing and hopefully getting that job you've spent four years preparing for...
But mostly it is the month for graduation parties.  I have just two to attend, but both are "doubles" parties. One was for my grandsons, who graduated from high school (Tony) and 8th grade (Jaylen). Their cards are pictured above. I spent almost as much time looking for awesome quotes that fit each boy as I did creating the cards, but I managed to find the following:
For Tony, "It takes courage to grow up and become who you really are"
For Jay, "Always be a first-rate version of yourself,instead of a second-rate version of somebody else"

The next party if for two sisters, Brittany graduating from college, and Samantha from high school. This is for Sam,
and this is for Brittany:
Looks like a lot of schools have red and black for their colors!!


Tuesday, April 22, 2014

QKD Has New Releases Just in Time for Spring

Did you attend the new release party at Queen Kat Designs on Facebook?  I was one of the lucky commentators to score a free QKD digi of this image.  It's called Lizzy Love #25 by artist Lizzy Love!  How cool is that?! So this is what I did with my new digi.
I colored her with Copics. Her original look sports a shamrock headband, but I decided to place flower sequins on the shamrocks for a pure spring look.  Then I distressed the edges and framed her with cardstock before adding her to an embossed and sanded card face.
I embellished with sparkling buttons, circle borders and some jute.  My sentiment is from a K&Co sticker sheet. I finished off my card with white gel pen lines around the perimeter of the card and boxing around my sentiment.
I don't know about you but I am SO ready for Spring. After spending Spring break in Seattle, where Spring is blossoming in the greenest greens and the boldest colors, it was so difficult to return to the last remnants of mucky snow and brown brown grass in Chicago. Ugh!
So I'm daring Mother Nature to catch up with my crafting by washing her hands of winter and welcoming Spring in all its beauty! Come on, Mom, let's see some sunshine and blooms and greenery!!  Are you with me, crafters?!
We would certainly love to see some cards and projects using QKD stamps and digis.  Please share them with us on Facebook!!  You never know when another contest will pop up!  besides, you can get some very awesome inspiration there.
Like what you see?  Stop by the Shop and have fun!

Tuesday, April 15, 2014

Spring Parade Showcasing Queen Kat Designs

Hip hip hooray, celebrate the day--Spring weather has finally arrived!  And about time too!

So to celebrate, I have created a parade on my card today with an QKD April release called Happy Spring Chick by artist Jacquelynne Steves.
I printed my digi image at two different sizes to make it look like a mother hen and her chicks. I colored my images with Copics and framed it with cardstock. I used patterned papers from Marcella by K "Fiesta Birthday paper pack (including the circles used as embellishments). I also embellished with jeweled butterflies from Recollections and a paper-crafted butterfly from my leftover stash.
"Happy Spring Chick" is available in the QKD Shop, along with many other fabulous images and rubber stamps.  Good news: rubber stamps are also available already cling-mounted!
Challenges I am entering:
 
Craft Your Passion - Bunnies, Chicks & Eggs


Tuesday, April 8, 2014

Another New release from QKD

Today my card showcases another new release, this time from artist  Jacquelynne Steves.  It's called Spring Chick.
  
I made a card using color blocking, as I don't make many that way and I need to stretch my crafting occasionally so I don't get stuck in a rut.  The patterned papers are a mix of leftover and my own hand-painted background using watercolors.

After decorating the top with various pieces of lace and trim, I added a few jewels and a nice sparkly button to denote the longer days and warmer Spring temps.  A tiny bouquet finishes off my card.

I colored my chick with Copics, then distressed the edges using Tim Holtz Faded Jeans distress ink. My chick looks so happy, waving her banner to announce that Spring is (finally) here!  I'm happy, too!

You can find Jacquelynne's Spring Chick at the QKD Shop.  For more inspiration, check out the Queen Kat Designs Facebook page.  And as always, happy crafting!

Tuesday, April 1, 2014

Spring is Getting Ready to Bloom!

Today I used a Queen Kat Designs April release.  It's called Bloomin Basket by artist Jacquelynne Steves and it is just loaded with colorful blooms in anticipation of Spring!

I made a specially-folded card that was inspired by an image on Pinterest. I like it because it has a pocket in which to put surprises for the recipient.  In this case, it looks like a flower pot, so behind Jacquelynne's image, I plan to put a seed packet and send this card to somebody special!
After cutting and folding my "flower pot," (see instructions here) I added patterned papers from Basic Grey and the Paper Studio. I colored my basket with Copics, giving them sparkle and shine with smooch and Liquid Glass. The basket seemed to get lost on the patterned paper, so I colored a small paper doily with ink to frame it and then attached it to the front of my card.  I embellished simply with flower sequins, as the patterned paper was enough eye candy.
You can find Bloomin' Basket by Jacquelynne Steves in the QKD Shop. Happy crafting!

I am entering this challenge in Your Scrapbook Place challenge blog, which requires you to be inspired by a Pinterest project in order to play for prizes.

Tuesday, March 25, 2014

Love Rules without Rules

Today I made a card for my girlfriend, who will celebrate her wedding anniversary next week.  I love, love, love this QKD image called Steampunk Heart.  I had so much fun coloring and embellishing it!  Here I popped my colored image onto a piece of Tim Holtz Idea-ology patterned paper, tearing the edges.  I added to the effect with some diecut gears.
I adhered it all to background paper that was designed by me using three different acrylic paints and a credit card to scrape it all together into the pattern you see.  Punching holes at the bottom, I tied ribbons using more Tim Holtz (this time in the way of brads).   After adhering the whole thing to some sheet music, I finished off my card by rubbing some metallic acrylic gold paint around the edges.
You can play with this heart as well as other QKD images by checking them out at the Shop.  There are images and stamps for every crafting style!  Whatever you choose to make, have fun crafting!

Tuesday, March 18, 2014

Finally, Spring (Almost)


At Last! Spring is just around the corner!  I have been waiting all winter for Spring! LOL
And to celebrate a new season I have made a new card today.  I used "Sketched Bunny" again-I love the look of it and it is so easy to color up!
I have been sneaking a little Spring cleaning in before the actual day, so my card showcases some pastel paint chips I've been hoarding all winter.  I cut them and then adhered them at a diagonal, then popped my bunny image on them.
After inking the edges of my card, I added the Spring sentiment (printed on my computer from Word) as well as a line of pearls.  A nice simple card that heralds the new season!
For more Spring-themed images, check out the QKD Shop.

Tuesday, March 11, 2014

Birthday Wishes to Somebunny Special

Well, winter is still sticking around, but Spring is definitely in the air!  That's saying a lot coming from Chicago. LOL To celebrate the near-arrival of Spring, I used a gorgeous new release from Queen Kat Designs called "Sketched Bunny."
I printed my image three times, giving each a hint of Spring color using Copics BG10 & RV11, and Zig Brushables markers English Lavender & Butter.  The sentiment comes from another QKD stamp set called "Birthday Party ." by artist Sandra Caldwell.
I embellished simply with a few pearls,a yarn flower and embossed daisies.
I don't have a lot of friends or family with birthdays in the Spring.  Most of them celebrate theirs in the Fall; of course, I was born on Income Tax Day (my nickname was "daddy's little deduction").
Whether you make spring, fall, summer or winter cards, you will love the new releases this month!

Tuesday, March 4, 2014

Getting Steamy with a QKD Image

It's new release time over at Queen Kat Designs, and I have a great image to show you today!
I altered a composition notebook for my daughter.  She fell in love with "Steampunk Heart" one of the new digital images available at the QKD Shop.  She loves to write, so I covered a composition notebook with some handmade paper and distressed the heck out of it.
I colored this heart image with Copics, adding some shine in parts with Liquid Glass from CTMH.  I had a few gears from Spare Parts by the Paper Studio that I adhered onto the heart.  The rest of my gears and chains went onto my cover, along with some hearts and a journal sticker.
I have been cleaning out my craft room, trying to get organized, and I rediscovered some grunge board in the shape of latches.  I distressed them with inks, paints and mists, spraying and rubbing and sanding.  I'm quite proud of how they turned out. In person, they look like strips of leather. One thing I have also discovered in my craft room clean-out.  I don't have a lot of "distressing" supplies.  I'll have to fix that right away! LOL
My daughter saw her new notebook this morning and she loves it.  I might have to make another one, just for me!  For some more inspiration, check out the QKD Facebook page.  And get over to the SHOP if you want to purchase this little beauty of a digital image!!

Tuesday, February 25, 2014

Warming Up to Spring with a QKD Image


Today I'm trying to "think Spring."  The birds are slowly making their way back to the area, so I thought this pretty treat holder using Laura Macy's "Love Birds" was a good way to hurry the season along (especially when the treat is a packet of hot chocolate to warm up my insides).

I cut a piece of cardstock 8.5x5.75" and scored and folded at 2-1/2" and 6-1/2".  I popped my colored image onto a piece of patterned paper after punching the corners.  I did a little distressing with my blender tool and some distress ink.  I added lace on the top and bottom and placed it on the center part of my folded cardstock.'Then I adhered the back flaps together and punched a hole at the top through it all.

If you thread a piece of lace from the front to the back, you can then add a treat, like a pack of gum, a candy bar, or a packet of hot cocoa on top of the ribbon inside the card.  Push it down until it meets the bottom edge of the card, then tie it at the top.

When you pull on the bow at the top, the treat comes up out of its card:
So my treat card with the Love Birds stamped image (as well as the hot cocoa) will warm someone special this week as temps are supposed to drop to below zero yet again!!

Discover all the warm images QKD offers at the SHOP!!

Tuesday, February 18, 2014

Floral Thank You Card

Today I made a card using "Florophone," a QKD January new release.  I can't tell you how many times I have printed this up with which to make cards.

Here, I colored my image with Copics, framed it with cardstock, and popped it onto some handmade paper I was given by a dear friend, Liz.  I plan on giving this card to her as a thank you for her generosity, and for thinking of me as someone who can use it. She gave me 3 foot square rolls of this and more handmade paper with which to play!  Lucky me!

I attached my image onto embossed cardstock and embellished simply with a jeweled flourish that I cut apart for the two corners.

For more inspiration, check out the Queen Kat Designs Facebook page.  If you're interested in this cute image, go to the SHOP.
Check out the Buy 3, Get 1 Free February Sale here:

Tuesday, February 4, 2014

Thinking of Flowers on this Cold Winter Day

I have an altered art piece to show you today using the QKD digi image "Florophone."   I started with a cardboard container that had held Brie cheese.  After painting it, I used distress inks on a paper doily and added it to the top of my container.
I colored Florophone with Copics, adding a little sparkle with Stickles and Liquid Glass.  I used my circle cutting system from CM to cut out a frame for my image, allowing the flowers and butterfly to "escape" its frame.  Backing it with black cardstock, I attached my image to the container and the fun began.
A spray of mixed flowers adorns my art piece, while a cardstock sentiment finishes off the top.
To finish off the sides, I attached lace and pearls.   I haven't decided what to put into my altered container yet.  The possibilities include a set of altered round coasters, as well as circle-shaped note cards.  Any other ideas?  The container is about four inches wide.
Meanwhile, check out the STORE for more lovely images as well as some awesome inspiration!

Tuesday, January 28, 2014

QKD Card Is the Bee's Knees

I am loving the vintage images from Queen Kat Designs this month.  This image is digital and called Douglas and Emma, designed by artist Beverly Cowan.
I decided to make a triptych, which is a "set of three."  Instead of coloring the images with all colors of Copics, I colored the entire boxed image in one solid color, adding a little more depth to her dress and his suit.  For a little more highlight, I added diamond Stickles to her dress.  I framed them with black card stock.

I used a sheet of American Crafts paper from the Take A Note stack for the background, distressing the edges with ink.  After placing my images, I added a string of pearls (from a broken necklace), and a bit of lace for the top.  In the bottom corner, I shaded part of a paper doily with coordinating colors and stamped the sentiment using another QKD image from the Birthday collection.  I added some contrast to the patterns in the doily with black gel pen.

For a finishing touch, a threw on some sequins for extra sparkle.  Looking for vintage images?  The QKD Shop is the place to find them!  If you need some inspiration, visit the QKD Facebook page as well. You never know what crazy contests and prizes you'll find there!

Tuesday, January 21, 2014

Music Blooms in the Soul

Hello, crafters!  Pat here with a beautiful card using a QKD January new release called Florophone.  I found a piece of leftover patterned paper on which I placed my image. I liked the idea of the Florophone surrounded by butterflies, much like flowers growing in a garden.  My background paper is so rich with designs that I kept the embellishments down to a simple line of pearls and a single paper rose.

For more lovely images and loads of inspiration, check out the QKD Shoppe and the QKD Facebook page.

Tuesday, January 14, 2014

Putting on the Ritz QKD Style

Everything is copacetic when you're using a fabulous image from Queen Kat Designs.  Here, I made a mixed media wall art that is now hanging up in my craft room.  I colored the QKD digi with Copics.  The image is called Emma and Douglas, designed by the talented Bev Douglas.

I started with an oval piece of wood and Mod Podged some patterned papers onto it.  Next layer included the colored image and sentiment.  I printed it on my computer.  Before I embellished with the flower and pearl flourish, I used Distress inks to age the edges of my scene.

It's a very simple project with a great presentation, and it took me less than half an hour from start to finish!  I have been dabbling in mixed media canvases and wall art for the last several months and really love it.  It's the "bee's knees."

Have you tried it yet?  It's a lot of fun, and plenty of YouTube Tutorials out there.

Saturday, January 11, 2014

QKD Card Today

Hey, crafters!  I have a fun card to show you today.  I stamped up a Queen Kat Designs image called Frog Queen by the lovely and talented Sandra Caldwell.   I love this image and have used it often.

After coloring it with Copics, I framed it with cardstock first and then with another square piece of cardstock whose corners I punched (with my favorite punch).  I popped it onto a base of stitched cardstock and embossed paper.

I embellished with an acrylic sentiment, a couple stray beads and some sequins.  I like the look of the card.  the scene almost looks like an alien queen from another planet selfie!!  I have a friend who loves frogs so this card is going straight to her mail box via snail mail.

Do you still mail out cards or letters?  I do.  There's nothing more satisfying than getting mail out of the mailbox to open and read.  I try to send my grandkids mail, even if it's just a card.  The youngest, Bella, loves getting mail addressed to her (she's 6).


Wednesday, January 8, 2014

The Last of my Christmas Decorations Being Packed Away

I'm putting the last of my Christmas decorations away and came across this notebook I had made.  I used the QKD stamp called Christmas Elf & Bauble by Joanna Bromley.  You can find it here on clearance through January 31.  Don’t miss this fantastic deal!

I covered a composition book with patterned paper and then stamped the image three times, coloring each with Copics and framing them with red card stock.  I used Basic Grey chipboard alphas for the sentiment.

Each year I'm going to keep Christmas lists, card designs, poetry and other writings that I created and collected.  It's a form of journaling that I will only see once a year, but will hold many precious memories.


Tuesday, December 10, 2013

I'll Have a Blue Christmas Without You

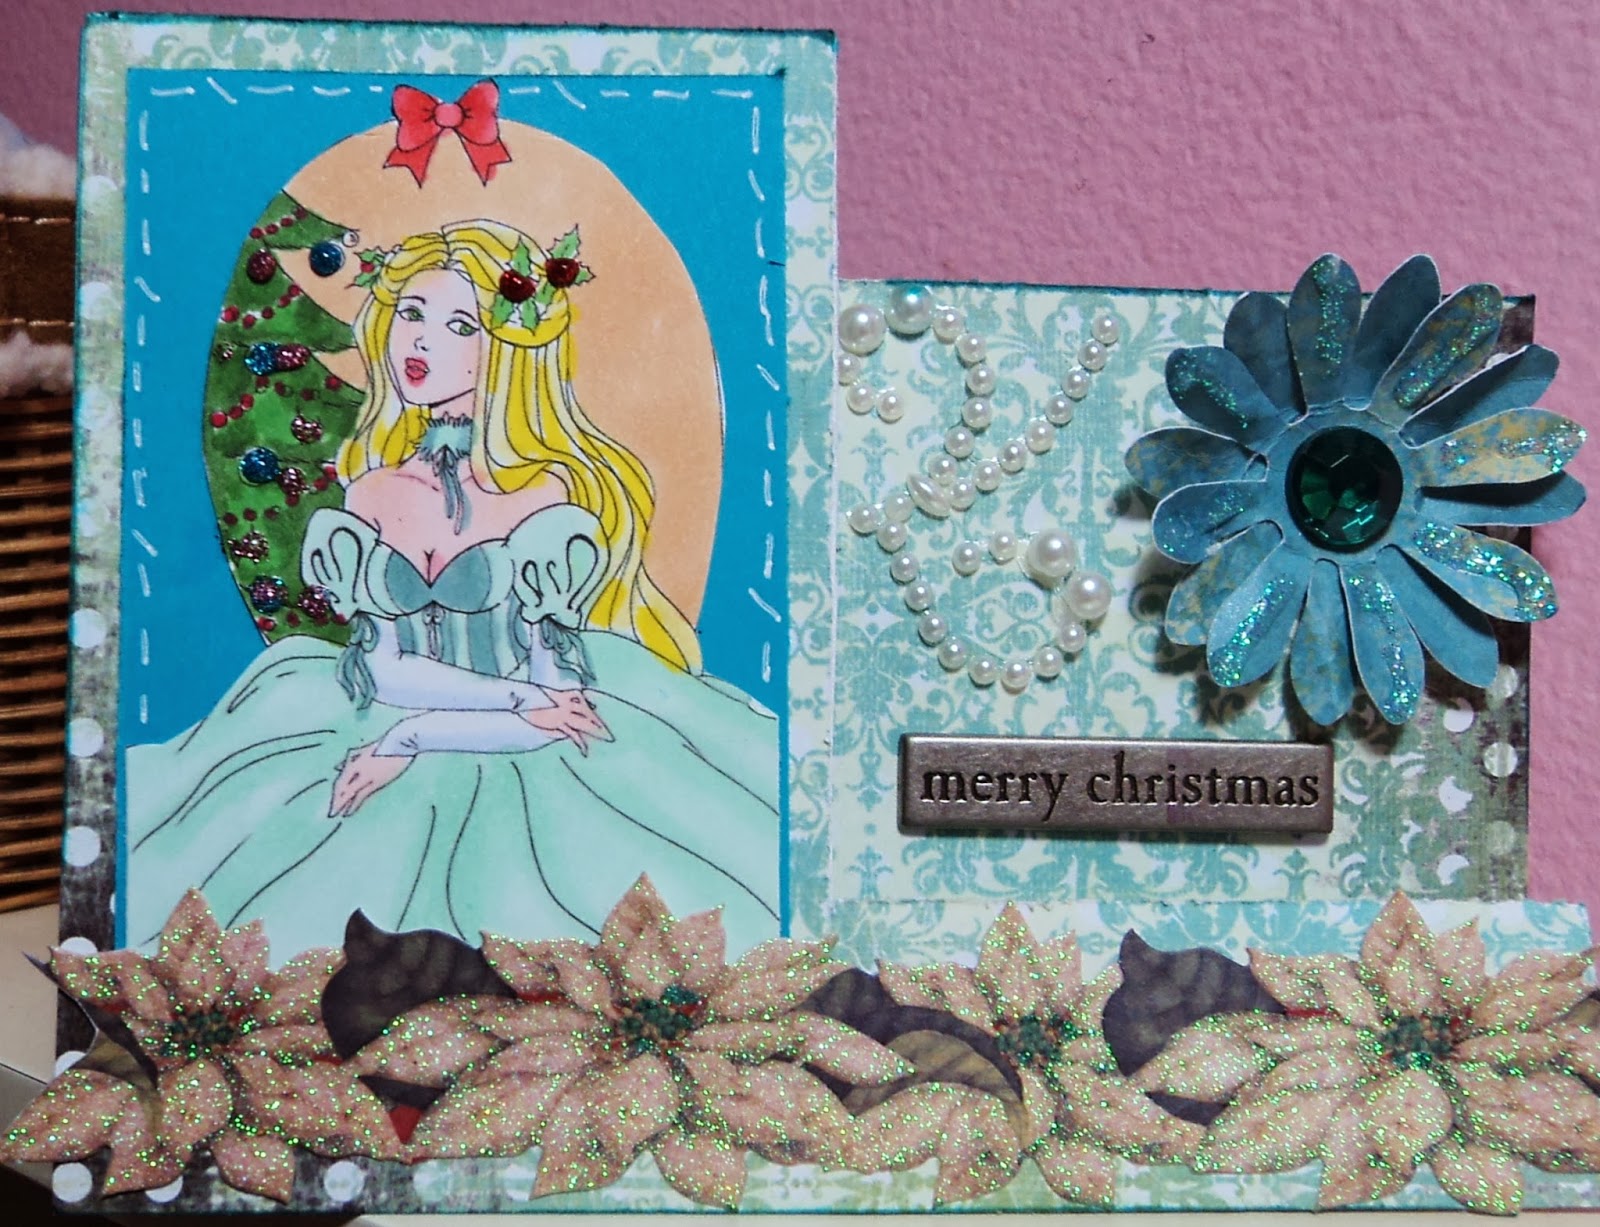
It's getting down to the wire and I still have a few more Christmas cards to make--yikes!1  Luckily I have a bunch of new Christmas images with which to make them, including this darling one from Queen Kat Studios.  Her name is Christmas Girl, designed by Milky Cat Studios, and she looks so blue.  She's waiting patiently for her fiancee.  She's hoping to set the date for their wedding tonight.  She's wondering if she could have everything ready for a June wedding...

But I digress...back to my card.  I decided to make a side step card, covering it with leftover patterned paper and distressing the edges with CTMH "Ocean" ink.   I snagged some beautiful cardstock border stickers from K&Co last year for PENNIES and the white poinsettias are just a small part of the package.

A handmade flower from my crafting friend Shannon (thank you again) brings more teal into my card.  I embellished with a metal brad sentiment and some pearl flourishes, both items from my Christmas stash from years ago.  A smidge of Stickles gives my card a little shine and it's done!

Check out all the new releases at the QKD Shop-there's a sale going on, so get over there now!


Tuesday, December 3, 2013

Christmas is Coming - Did you Survive Black Friday?


Have you started your cards and gifts yet?  I have, with some of the November releases from Queen Kat Designs.  This beauty is called "Snow Crystal" and is designed by the talented artist Marianne English.  I colored her with Copics and then diecut the image with Spellbinders Nestabilities Radiant Rectangles die.

I used leftover papers from my stash to frame my image, as well as on my card base.  I kept the embellishments simple, using fiber, leftover adhesive pearl flourish and a pearl floral stick.  Easy peasy, but great presentation!

Do you have some crafty tricks up your sleeve that make your creative life easier?  Please share them with us, as we all need help in stretching our crafting time!!  I'll give you a hint right now:  QKD has some lovely Christmas images in both rubber and digital formats.  Go check them out at the SHOPPE.  And do it quickly!  The 40% off sale is still on for a very limited time!!

And as always, crafters, have fun!!