I saw this idea on a friends' blog and couldn't wait to try it! It's a captured fairy in a jar, and it is earth-friendly. I say this because I had all the supplies in my craft room, so I wasted no gas. I bought the brunt of the material when my local Michael's closed, snagging gorgeous 3-dimensional flowers at a pittance (including the wonderful jars they came in like this one).
The beautiful, shy fairy that I captured is a Gina K Designs stamp set called Wishes and Dreams by Alicia K. I love her Manga fairies!! After coloring and adhering the image, I attached feather butterfly wings to her body, in place of the wings that were part of the image. Some gorgeous Recollections flowers, tiny seashells from a vacation purchase and some froofroo fibers finish off this birthday present for my granddaughter, who will be turning 4 in october and is very much into fairies.
Wednesday, September 28, 2011
Monday, September 26, 2011
The Month of Mmm, Candy is Almost Here
That's right, I am a Halloween fiend, making my goodie bags, decorations and cards a full month in advance, so I can relax and enjoy the month as it unfolds. Take today's project...
There are several young children on the block who get special treats from me instead of just a grab in the candy bowl. Using Nerdy Girl Devil digi image by Squiggelfly (isn't she too cute!), I made a PULL-CARD and stuffed it with a King-Sized KitKat chocolate bar. Their challenge this week is to use flowers on your project, which is always fun to do! My patterned paper is flower-patterned, and I cut several flower petals to frame my image.
The way a pull card works is you build a "box" from cardstock and decorate it. When it's all embellished, you punch a hole at the top of the front and back sides of the box and thread a ribbon through it.
Your ribbon should be 2-1/2 times the length of your box, because you slip a candy bar on top of the ribbon between the front and back sides and push the candy down into the box, pulling the ribbon with it.
Once the candy is all the way in the box, tie the ribbon at the top in a bow. When you want the candy, all you have to do is pull the ribbon up and the candy bar, sitting on the bottom of the ribbon, will pull up with it (see below).
Got a Squiggefly image? Go on over to the Squigglefly Challenge blog and enter to win this week! If you don't have one of their images, get a freebie HERE. As always, have fun in your crafting!!
 |
| Squigglefly Pull Card |
The way a pull card works is you build a "box" from cardstock and decorate it. When it's all embellished, you punch a hole at the top of the front and back sides of the box and thread a ribbon through it.
Your ribbon should be 2-1/2 times the length of your box, because you slip a candy bar on top of the ribbon between the front and back sides and push the candy down into the box, pulling the ribbon with it.
Once the candy is all the way in the box, tie the ribbon at the top in a bow. When you want the candy, all you have to do is pull the ribbon up and the candy bar, sitting on the bottom of the ribbon, will pull up with it (see below).
Sunday, September 25, 2011
A Handful of Hambo
I got a couple of new digi images from Hambo Stamps and I just couldn't wait to pay with them. They've just closed a Design Team Call that ended last Friday. The new team will be announced on September 28th.
 |
| Banana Kid digi image from Hambo Stamps |
For my first card, I used Banana Kid digi image. I made an easel card because I think it’s the best presentation when using a riddle on a card. The sentiment reads “What do you get when two bananas get together?” When the easel card is opened, the answer is “A Pair of Slippers”.
I know, it’s so corny that it’s cute!
I printed my images twice, once on mirror image so it looks like the two of them are facing each other. Digi images are great that way---any size, any perspective, anything goes!
Actually, I printed four images, so I could color and cut out just the banana body and face on each to give them added dimension. I used my trusty Copics and found some fun patterned paper in my stash, leftover from another project. I lucked out on a small but perfect piece of patterned ribbon in a coordinating print.
I have the Banana Kid and the Strawberry Kid digi images and am working my way through the Hambo “grocery aisle” to collect all the fruit and veggie kid images.
 |
| Wee Henrietta Witch by Hambo Stamps |
On to my second card…I printed Wee Henrietta Witch digi-image. I love the Wee Henry and Henrietta line of images. I really liked working with this one, since I have Halloween on my mind. She looks so cute, all ready for Trick-or-Treating, pumpkin in one hand and broom in another. I had a leftover piece of DCWV patterned paper from the Once Upon a Time stack, and an embossed haunted house that was just right for this card. A piece of lace and a jet black bead on the roof of the house, and all it needed was Wee Henrietta to stand in front, welcoming all the little ghosts and goblins to her humble abode.
I colored the image with my Copics, and gave dimension to the broom stick by coloring and attaching a toothpick for the handle. I bundled some raffia together with a bit of gold wire for the broom’s business end. I printed and colored one more image of her so I could cut out and adhere her hand (with a dimensional dot) on top of the full image, making it look like she’s holding the broom.
 |
| Wee Henrietta Witch digi image |
Since I have a few kids on my block, I usually give them a special treat bag for Halloween, instead of the normal hand in the candy bowl. So I used Wee Henrietta Witch digi image on a few treat bags for my neighborhood ghosts and princesses. Their parents know me (and my hobby), and the kids love the candy while the moms love the bags.
I colored my image with, you guessed it, my trusty Copics, adding some shimmer with black Stickles. Patterned paper, a few foam stars and a sticker or two (all from my leftoversa stash of Halloween papercrafts) make this project easy-peasy, although I did have to work at threading that wonderful Halloween-printed ribbon through the holes.
The fun really starts when I go to the store to buy a few special treats for my special kids!
 |
| Banana Kid digi image |
I had time for one more card so I used Banana Kid digi image. I tried a blocking technique on my card, using leftover pieces of patterned paper in a black frame. (Remember, I have made reducing my stash a crafting goal this year and havbe made quite a bit of headway)
I made an apology card, because I thought the Banana Kid went perfectly with the sentiment “Sorry I slipped up” (and a little humor helps smooth the way toward forgiveness and reconciliation when friends aren't seeing eye to eye) I framed my sentiment using my Epic Six and Spellbinders Nestabilities Label Four dies. A few faux pearls and a mini rose finish off the card. Now, if you received this card from a repentant crafter, wouldn't you be of a mind to forgive and forget?
Hope you liked the card show. Remember to check out Hambo Stamps and their challenge blog for inspiration and great digi images!
Saturday, September 24, 2011
From the Depths of my Heart...
That is the sentiment that comes with this too-cute Hambo Stamps Pigsub digi-image!! Hambo Challenge Blog has a very worthwhile challenge this week: Make a card and send it (with a blank envelope) to Monica at:
I made a Z-Fold card for this challenge, but turned it 180 degrees, so that the card opened up instead of out. A white oval for writing a message is on the inside of the card, behind my seapig's sub. I love the patterned paper I found in my leftovers drawer and wish I had a piece of it to ID the paper company. Since glitter is one of the no-no's for making cards for OWH, I used Liquid Glass to make a few bubbles rising from the sub, as well as put a little shine on the sub's porthole (but you can'r see it in the photo, sigh).
Have fun paying the Hambo Hoedown this week, and don't forget to leave a little love here!
Hambo Stamps
OWH Challenge
4907 W. Grace Street
Richmond, VA 23230-3609
for Operation Write Home. Your card has to follow the OWH guidelines, but if you play this week, you not only get a free digi sent to you to use in next week's challenge, but your card will make a soldier and his or her family very happy. Homemade cards are treasured by our servicemen and women who are deployed around the world, as they don't have access to greeting card stores. I have sent more than 120 cards overseas so far, through various agencies, including my son's unit, who has sent out three deployments in the last year.
 |
| Pigsub digi by Hambo Stamps |
Have fun paying the Hambo Hoedown this week, and don't forget to leave a little love here!
Sunday, September 18, 2011
"House" Everybody?
Fall is definitely in the air. The mornings are chillier, the days shorter and the leaves are just now starting to turn colors in my neck of the woods. I love the Fall, so it's no wonder I chose a Halloween theme for this week's Hambo Hoedown. The challenge was to use any Hambo image and something around the house that you'd normally not think of as a craft item. Peek into my windows and all you'll see is your reflection from the aluminum foil I used after I cut out the panes!
I chose to use the digi image House2 by Hambo Stamps and colored it with my trusty Copics for the holiday of costumes and candy. As an added bonus, I also printed the digi image Strawberry Kid, attached a pumpkin button for a treat bag and gave him top billing as this house's first Trick-or-Treater!
I love the fact that you can mix and match Hambo's digi images for a great looking card. Maybe in December, I'll color this same image, toss some lights on the roof and decorate it for Christmas!!
Don't have any Hambo images yet??? Click HERE for freebies! And for great inspiration and your chance at a free digi, check out Hambo Challenge Blog's newest challenge!
Friday, September 16, 2011
Sing Your Art Out - Hambo Blog Hop is Here
Music runs through my veins, so when Hambo Stamps announced their theme to be “Sing Your Art Out”, I knew I had to join in the fun. Anyone who knows me, knows that I am forever humming, whistling or singing constantly (sometimes over and over and over and…well, I have been known to drive the people near me to madness when I can’t get a song out of my head). If you came from Leslie's blog, then you're on the right track. If not, start HERE for a toe-tappin', hip-hoppin', jammin good time!
I have to admit that I made not one but THREE cards (and I was hard-pressed to stop there) for this Blog Hop.
 |
| Cool Cat digi image |
 |
| Cupcake Rain |
For my second card I used Cupcake Rain digi image, one of my favorites (and a prize for being Queen of the Hoedown on Hambo’s weekly blog challenge). Mmm, cupcakes - every girl’s sweet fantasy, yummy daydream - and I am definitely a “Daydream Believer”. This song by the Monkees inspired me to make my card. Using Copics B04, G14, E00 & 08, Y11 & 17, RV34, C1 & 3 and R29, I colored my image, glitzing it with Sakura twinkling gel pen and Liquid Glass. I used green Glitter carstock for the background and leftover pieces of patterned paper to frame the image. Even my cupcake embellishments were leftovers from a previous project!
 |
| Pig Inmate |
I colored my penitent pig with Copics: R29, RV04, N3 & 100 (black). I cut out a large circle from white glitter carsdtock to spotlight my image, inked the edges a bit (my favorite technique), and attached a "ball & chain" made from a felt button and a key chain. I popped the fugitive onto the text-background paper and attached it to a 6x6 card base of Paper Trey Hibiscus Burst cardstock.
Now it's time to sway to the rhythm of Hambo—on to the next blog , but don’t forget to leave some love before you go!!
Below is the full blog list in case you get lost:
Talk to the Ham - Hambo blog - http://hambostamps.blogspot.com/
Gloria - http://girlgonescrappin.blogspot.com
Karin - http://karin-withaniforpaper.blogspot.com
Debbie - http://inklingtostamp.blogspot.com/
Dawn A. - www.alwayscrafting.blogspot.com
Bonnie - http://theluckyclucker.blogspot.com/
Jen - http://jetstudio.blogspot.com/
Lynn - http://creativecraftsbylynn.blogspot.com/
NoraAnne - http://www.robinsonsnest.blogspot.com/
Lindsay - http://awaytosayhello.blogspot.com/
Karen - http://www.busybusyhoneybee.wordpress.com/
Libby - http://stampinlibby.blogspot.com/
Carla - http://scrappypug.blogspot.com/
Dawn M. - http://art-orsomethinglikeit.blogspot.com/
Paula - http://heyheypaula-heyheypaula.blogspot.com/
Mary - www.mystampinhide-away.blogspot.com
Jenn - http://www.jaxbeanstalks.blogspot.com/
Paige - http://www.shewhomuststamp.blogspot.com/
Marcie - http://www.cardmakinchaos.blogspot.com/
Leslie - http://thecrookedstamper.blogspot.com/
Pat - http://patacakespages.blogspot.com (that's ME)
Beverly - http://beestamper.blogspot.com/
Yolanda - http://yolanda-imaginemakeshare.blogspot.com/
Judy - http://jarfullofjoy.blogspot.com/
Wednesday, September 14, 2011
QKD is Celebrating Halloween Early
I have had this Queen Kat rubber stamp for a few months now, and have never used it due to lack of imagination (on my part). I couldn't think of a way to use "Corset" by QKD on a card or layout...until now! QKD just posted a Halloween theme this week on Facebook, and my muse whispered in my ear "use the corset", so here is my card.
I stamped the image on patterned paper, then added more color with Copics: YG03,67; N3 & 100 (black). I glitzed up the corset with adhesive-backed jewels and black Srickles.
I decided to frame in on newsprint which had been diecut and inked, then on a couple blocks of cardstock. Black Skittles and a button finish off the embellishments for the image (the one at the top spells out Magic).
I printed the sentiment from Word and prettified it with a black flower. And now the last of my unused QKD stamps have been welcomed into the fold of gently stained, highly loved favorites.
Do you Facebook? Check out all the lovely cards and projects HERE.
 |
| Corset by QKD |
I stamped the image on patterned paper, then added more color with Copics: YG03,67; N3 & 100 (black). I glitzed up the corset with adhesive-backed jewels and black Srickles.
I decided to frame in on newsprint which had been diecut and inked, then on a couple blocks of cardstock. Black Skittles and a button finish off the embellishments for the image (the one at the top spells out Magic).
I printed the sentiment from Word and prettified it with a black flower. And now the last of my unused QKD stamps have been welcomed into the fold of gently stained, highly loved favorites.
Do you Facebook? Check out all the lovely cards and projects HERE.
FALL Into This Challenge
I had some time this weekend, amid the Parish Family Festival, a weekend overnight with my granddaughter, 25 Christening invitations to create, and the emotion-packed media stream of the tenth anniversary of our country's lost innocence, to put aside life for a short time and create something good and honest and fun and stress-free.
I decided to use a Humphrey stamped image from Crafter's Companion to create a Fall-themed card for their September challenge. I am a huge fan of the Humphrey collection. This image is from the "Best Friends" stamp set.
Sticking with my 2011 Crafting Resolutions of using up my overgrown stash of leftover..well, everything, I found the perfect background for my card with one of those scrapbooking calendars from a previous year. I cut out the open space to frame a scene for my BFFs as they take a colorful walk together. I added some diecut leaves and flowers around the frame, and used Sakura Clear Star gel pen to give it a little shimmer all over.
I colored my image with Copics: E00,08,35,71; Y11,17; YG03; YR04; RV00; C1,3 & 100 (black). Liquid Glass put a shine on a specific places. I didn't want to lose the image against the colorful and busy background scene, so I used Copic E08 to shadow around the image, after adhering it to the card with dimensional tape.
The inside of my card (not pictured) is color-coordinated and uses a quote "each day is a miracle" that I had made into card candy for a swap last year. The journaling box, which I left blank, is framed with 4 diecut leaves topped with letters spelling out the word FALL.
As I mentioned above, I am entering this card in the Crafter's Companion September challenge, which asks for a Fall theme and thge use of a CC image. Their prize is a fantastic 5 in 1 Paper Trimmer that I have had my eye on for the last couple months now. It's a great tool ,especially used in combination with their Ultimate Crafter's Tool, which I do have already. If you want a chance to win this fabulous prize, go to the Crafter's Companion Challenge Blog to be inspired by the design team's projects and enter the challenge.
Monday, September 12, 2011
Hot, Hot, Hot
The Color Challenge at Squigglefly Challenge Blog calls for the HOT colors of RED and/or ORANGE. I must use red and orange a lot, as I had a full folder of leftover scraps in my file drawer to use for this challenge. So saying, I gathered up my orange and red scraps and made a cute little Wine Gift Bag for a dear friend who has been working her butt off to get ready for classes. I mean little--it will only fit one or two of those individual bottles of wine.
Anyway, I used Squigglefly digi-image "This Little Piggy Had Chardonnay" by Suzanne Urban. I love her images and own a few of them.
I colored my little piggy with Copics: R29; RC00,34 & 100 (black). I added some shine with Stickles and Liquid Glass. Framing my colored image with a bit of red, I then placed it on an orange piece of paper and glammed that up with ribbon and jewels.
Now it's your turn to jump into this color challenge with your own project. You can use any image to play along, but to be eligible for the prize you must use a Squigglefly image. Head on over to the shop, or check out our freebies! If you're the winner you get to choose any Squigglefly image (including sets!) as your prize!
All I need now to finish my gift is to buy the bottles of wine and she will be able to get some well-deserved relaxation! Come to think of it, those bottles come in 4 packs, don't they? Hmm, I have been working very hard myself lately...
Sunday, September 11, 2011
FALL FLOWERS
There is a lot to say about the flowers of Autumn, not just the leaves. So much of the colorful scenery that the season of Fall presents are due to the flowers, too.
Using Flowers-digi from Hambo Stamps, I made a card in tribute to the unsung foliage of Fall, the flowers. I made a Stair Step card, whose design I found HERE at Splitcoast Stampers.
I followed my crafting goals of 2011, which are to use up the leftovers I have stashed in every nook and cranny of my craft room/granddaughter's bedroom.
I paper-pieced all the lovely flowers you see on my card, and set them to shine in the sunshine using Stickles. The sentiment is a part of some card candy from an old swap that was left over. I nudged the colors a bit with Copics, and finished it off with a leaf-shaped button in the top right corner. (The colors appearing in the photo sure don't match up with the colors I see with my old eyes, so something is wrong with my camera or the poto uploader!)
I am entering this card in the Hambo Hoedown this week. All they ask is a Fall theme and flowers using one of their digi images. Don't have one? Click HERE to check out the freebies! Every player gets a free digi each week they play and follow the guidelines, so what are you waiting for? Dance on over there!!
Let There Be Peace on Earth...
Wow! I can’t remember ever spending most of any day in tears. The memorial anniversary of the terrorist attack on our country is filled with personal horror stories, heroes' untold stories, children’s sorrows, families’ grief, emotion-charged photos and videos, and my personal memories and feelings. Although I did not know anyone lost that day personally, I have good friends who did, and “…any man’s death diminishes me…” My prayers, tears, well wishes and heart go out to all of us for our lost innocence, but mostly for those who felt the tearing apart of their families and their own hearts.
 |
Photo by Getty images/pool
|
I snagged a photo off the internet (credit given under the photo) that I think says it all, but it was heart-wrenching and almost impossible to choose from so many. Let this day be a day of remembering, of honoring, of forgiveness and fresh starts, for peace on earth, for tolerance, for recognition of heroes, for healing.
Wednesday, September 7, 2011
A Royal Welcome to Fall
 |
| S.W.A.L.K. Little Princess stamp |
I colored my image with Copics: E00,35; Y17; YG03; YR07 & R05. I glitzed it up a bit with Clear Star and White Gelly Roll pens and with a black Spica glitter pen. Some Liquid Glass from CTMH and yellow Stickles complete the coloring and shimmer. For embellishments, I found a small piece of wide red ribbon, a few metallic leaf brads and some sequins and beads in the right colors. A cream-colored pearl tops her crown.
I left the inside blank so I could use it in the future for any occasion.
Crafter's Companion has a month-long challenge to create a Fall project, using one of their images. They have the most detailed, gorgeous images, including Fairyopolis collection, Popcorn the Bear and designs by Sheena Douglas. I have quite a few of these myself, and have a wish list for more (I'm greedy, I am!). So skip on over to Crafter's Companion Challenge Blog and be inspired by their cards and projects and play in their challenge. A random winner could win their extremely popular Clever Cut 5-in-1 Paper Trimmer!!
Monday, September 5, 2011
Spinning Swing Card Takes Flight
I happened on this awesome tutorial that a crafter made to show off the "mistake" she made on a swing card. Turns out she topped the sing card design with her own! See below for the link.
So, the challenge at the Hambo Hoedown asks for DIMENSION in a project, using "Alien Spaceship" digi image, or any other Hambo image. If you don't have one already, you can check out the freebies HERE.
I used Alien Spaceship, because I decided to make a "Congratulations on your Driver's License" card for my daughter, who will be getting hers very soon (I didn't say too soon, I said very soon). I fell in love with the spinning swing card and knew it would make the perfect venue for this image. I colored the spaceship with Copics: BG10, 72; RV34; Y17; C1; N3 & 100 (black). I colored two, so that when the image spins, you can see it on both sides. I used some black elastic string to hanG my image, although clear beading string would have worked better. I cut the card using a template for the swing card, but cut the inside portion completely out, so that the image would spin freely. I used Paper Trey Hawaiian Shores cardstock for the base, and a piece of DCWV Star Swirl Gold patterned paper for the background. A few embellishments later and I have a card that will not showcase properly without making a video of it. So if you see the video here, then I am better at the technical stuff than I thought. If it's a photo, then you'll just have to follow the link to see the original card by the creator of this fantastic 3D art. I just may have to try to publish both to satisfy my pride!
Meanwhile, fly to the Hoedown and check out the new challenge. Every player wins a free digi image for the next challenge, and you're going to love their images!!
p.s. here's the link to the tutorial: http://www.papercraftplanet.com/video/dazzling-spinning-snowflake
So, the challenge at the Hambo Hoedown asks for DIMENSION in a project, using "Alien Spaceship" digi image, or any other Hambo image. If you don't have one already, you can check out the freebies HERE.
Meanwhile, fly to the Hoedown and check out the new challenge. Every player wins a free digi image for the next challenge, and you're going to love their images!!
p.s. here's the link to the tutorial: http://www.papercraftplanet.com/video/dazzling-spinning-snowflake
When Family is Far-Flung...
...about the only time we get the whole gang together is at weddings and funerals. Luckily, this weekend it was a wedding. The ceremony was at Holy Name Cathedral, a gorgeous place of worship where the Cardinal resides and celebrates Mass. The reception was held at Cafe la Cave, whose name is corny but whose environment is 5 star. Hubby and I went, and my daughter went as my sister's date. The table at which we sat held almost our entire family, those of us that are left. It's sad to go to weddings and be surrounded by tables of family, and know that ours comprise roughly 12 people!
Anyhow, I made a wedding card for the event, using a card for inspiration that I discovered on SplitCoast Stampers. I used White Glitter cardstock for the base, adding a layer of paper from My Mind’s Eye Holiday Glitter Stack and another from Anna Griffin Christmas Scrapbook Cardstock Stack. I stamped the Stampology “Between the Lines” sentiment with ColorBox Gold ink pad and embellished it with adhesive-backed pearls. The flowers are from Michael’s, the lace from a rummage sale find and the key from my magic box of leftovers!
The inside showcases a quote from Barbara De Angelis, framed with pearls and lace on the top piece, and the bottom is stamped using Anna Griffin pigment ink pad in brown and cut out using my Epic Six and Nestabilities Label Four. I inked the edges, placed a pearl at each end, and used Gold and Silver Stickles for the rings. I placed a tiny pearl border at the bottom, leaving room for our signatures.
Because the card is so chunky, I brought out my Ultimate Tool from Crafter’s Companion and made an Envelo-Box about a half inch thick in which to place the card. I love my Envelo-Boxer and Ultimate Tool! I’m using it more often, and actually made it with using just the measurement guide instead of the dvd for instructions.
Check out this link for the card I used for inspiration at
http://www.splitcoaststampers.com/gallery/photo/2042691
I've entered this card in the CRAFT YOUR PASSION Challenge.
I've entered this card in the CRAFT YOUR PASSION Challenge.
This is first "Anything Goes with a TWIST" challenge. This week's twist is FLOWERS. Make sure to add at least one flower to you project this week. And don't forget to vote for next months TWIST.
Color Challenge at Squigglefly
This week's challenge at Squigglefly Challenge Blog is a color combo challenge of BLUE & GREEN. I chose to use the digi image "Surprise from Sara" as my focal point. I used blue cardstock for my card base, and cut a piece of scenic patterned paper for the background. The sun's trailing rainbow inspired me to use fibers and ribbon as I've never used them before, as part of the scene, not as an embellishment. I haven't yet decided if I like this technique or not.
I used a leftover piece of patterned paper for the rolling hill on which Sara stands in the sunshine, and used Baby Blue Stickles to accent the clouds, smudging the lines a bit. I cut the tiny butterfly out of a portion of the patterned paper I wasn't using.
I colored my digi image with Copics: E00, Y17, YG03, B04 & RV04. I also used Sakura glitter gel pens for a little shine and depth on my scene.
If you like to play with color combos, then head over to the Squigglefly Challenge Blog for this week's challenge! You don't have to use a Squigglefly image to play, but if you want a chance at the prizes, you need to use them. If you don't have any, you can start off with a FREEBIE like I did when i first started playing their challenges.
I had fun with Blue and green this week. I wonder what next week's color combo challenge will be? Whatever it is, I'm sure to be inspired and challenged. Enjoy!
Friday, September 2, 2011
Queen Kat Design Call
I heard that Queen Kat Designs is looking for a few good cardmakers, so I have been pulling out my Copics and papers and embellishments and working on a few cards to enter the running.
My first card uses Kiss Me Froggie from Queen Kat Designs, as well as Manga Fairy from Sugar Nellie.
The card base is Core-dinations paper whose edges I sanded to distress it a bit. On top of that I added dark brown cardstock from The Paper Company, and a piece of DCWV Luxury Stack for my background. I had some leftover diecut flourishes from another project that I placed on my "canvas", touching it up a bit with Stickles and jewels. The flowers are a combination of Primas and Michael's brands, on which I attached a clear acrylic flower button and a jewel. I folded the flower on which my Manga Fairy sits. I colored my fairy with Copics: Y11,17,35; YG03; BG10,72 & V000. I added a little shimmer with AT YOU Black Twinkle pen and a lot of shimmer with CTMH Liquid Glass and Stickles.
The object of her affections is that cute little frog prince from QKD, whose smile lets you know he knows she's captivated by him! Just a word of advice to those little girls looking for a frog prince to kiss: The crown is a dead giveaway!!
For my next card I used a Hambo Stamps digi image called St. Pat Hamster on a tri-fold card. I colored him twice with Copics E00,37: G94; R11 B60 & 100 (black), then cut out the pot of gold and the shamrock on his hat and used dimensional dots to attach them to my full image. I gave him a little shimmer with CTMH Liquid Glass. I colored the gold with Copics Y11 & 17 and used two different colors of Stickles (gold and yellow) and Liquid Glass sparingly throughout the coins. Finally, I adhered some tiny mixed gold beads at the bottom of the pot.
I used Paper Trey cardstock for my card base and framed some leftover patterned paper with white cardstock for the background.
On the inside, I Stickled some paper flowers in coordinating colors to the top of the piece, and used my Nestabilities Scalloped Ovals for the inside sentiment.
Yes, St. Patty's Day is a long time coming, but everyone could use a bit of luck any time!
For my final entry, I had just found a steal of a deal at my local Goodwill store, seizing three large mounted rubber stamps, and I though the kitty in the hat box by Linda Grayson was a great image to color and place on a card. I used basic grey patterned papers for the base and blocking. I used Copics: C1,3; Y11; V000; RV00,04 & YG03 to color my image. I find I am sadly in need of more markers! For dimension, I added some assorted colors of Stickles and some Liquid Glass. I carried the flower theme onto the rest of the card, using a few Michael's brand roses in various sizes, and adding a tiny amount of luminescent pearls to the patterned paper. Oh, I forgot the feather, didn't I? Well, I don't know why I put a feather on the card, it just seemed to beg for one! I call this card, "Love in a Box." Don't you just want to pick up that kitty and snuggle with it? (and I am NOT a cat person!!)
So, wish me luck on the design call. You can check out all the wonderful inspiration cards and "gotta-have" images that Queen Kat Designs offers HERE.
Thursday, September 1, 2011
Good for the Soul
I love waking up to a new day, especially one in which you have kissed an addiction goodbye and can open your eyes in relaxation and the knowledge that it no longer controls you. I'm talking games here, people, namely Cafe World on Facebook. I was only playing the game for two weeks, but had obsessed so much during that short time that I advanced 42 levels, hired two waitresses, expanded my cafe three times, cooked four hundred entrees and had no life and little sleep, knowing there were customers to serve, goals to reach and food to cook. I was a maniac at that game, and once befi=ore had tried to quit, but got sucked up into its cuteness, its cartoonish appal. Are subliminals legal, cause I swear it used them to keep you playing???
Anyway, my life is my own now, although I will miss the friends I made playing the game, but now that I think of it, the only reason you make, confirm and invite them to be friends and neighbors is get attain more levels, get more parts, free meals and advance IN THE GAME! Yeesh!!
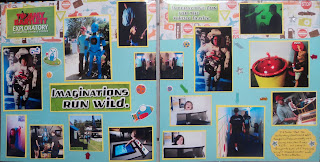
So, what have I done with my newfound freedom? On Sunday last weeknd, when I declared my liberation from my addiction, I cleaned house, stopped off at the farmer's market, did laundry, chaffered my daughter around, AND finished my vacation layout from our recent family trip to Wisconsin Dells!! That's eight pages of scrapping in one day. When you think of the MONTHS I have not scrapped, it is a minor miracle!I had a paper stack from Gartner Papers in a travel theme that I used for my base, embellishing with stickers, diecuts, jewels, etc as needed.


There were 106 photos that I had to weed through to get the ones that I wanted to use as the focus of our trip.
I used postcards and attraction ads and the Dells Vacation Guide book to journal, along with my handwritten notes.
I really miss going to those 12 hour scrops that my friend Heidi used to hostess. I wish they were offered to me again, but at least I have got back into scrapping, along with my card making.
The lesson here, people, is to choose your hobbies wisely, and don't let them control you. A hobby that is creative, educational and useful helps a great deal, too!
Subscribe to:
Posts (Atom)


