PagesPat's Ponderings

Showing posts with label step card. Show all posts

Monday, May 1, 2017

Spring Has Sprung at Scribbles Designs Challenge Blog

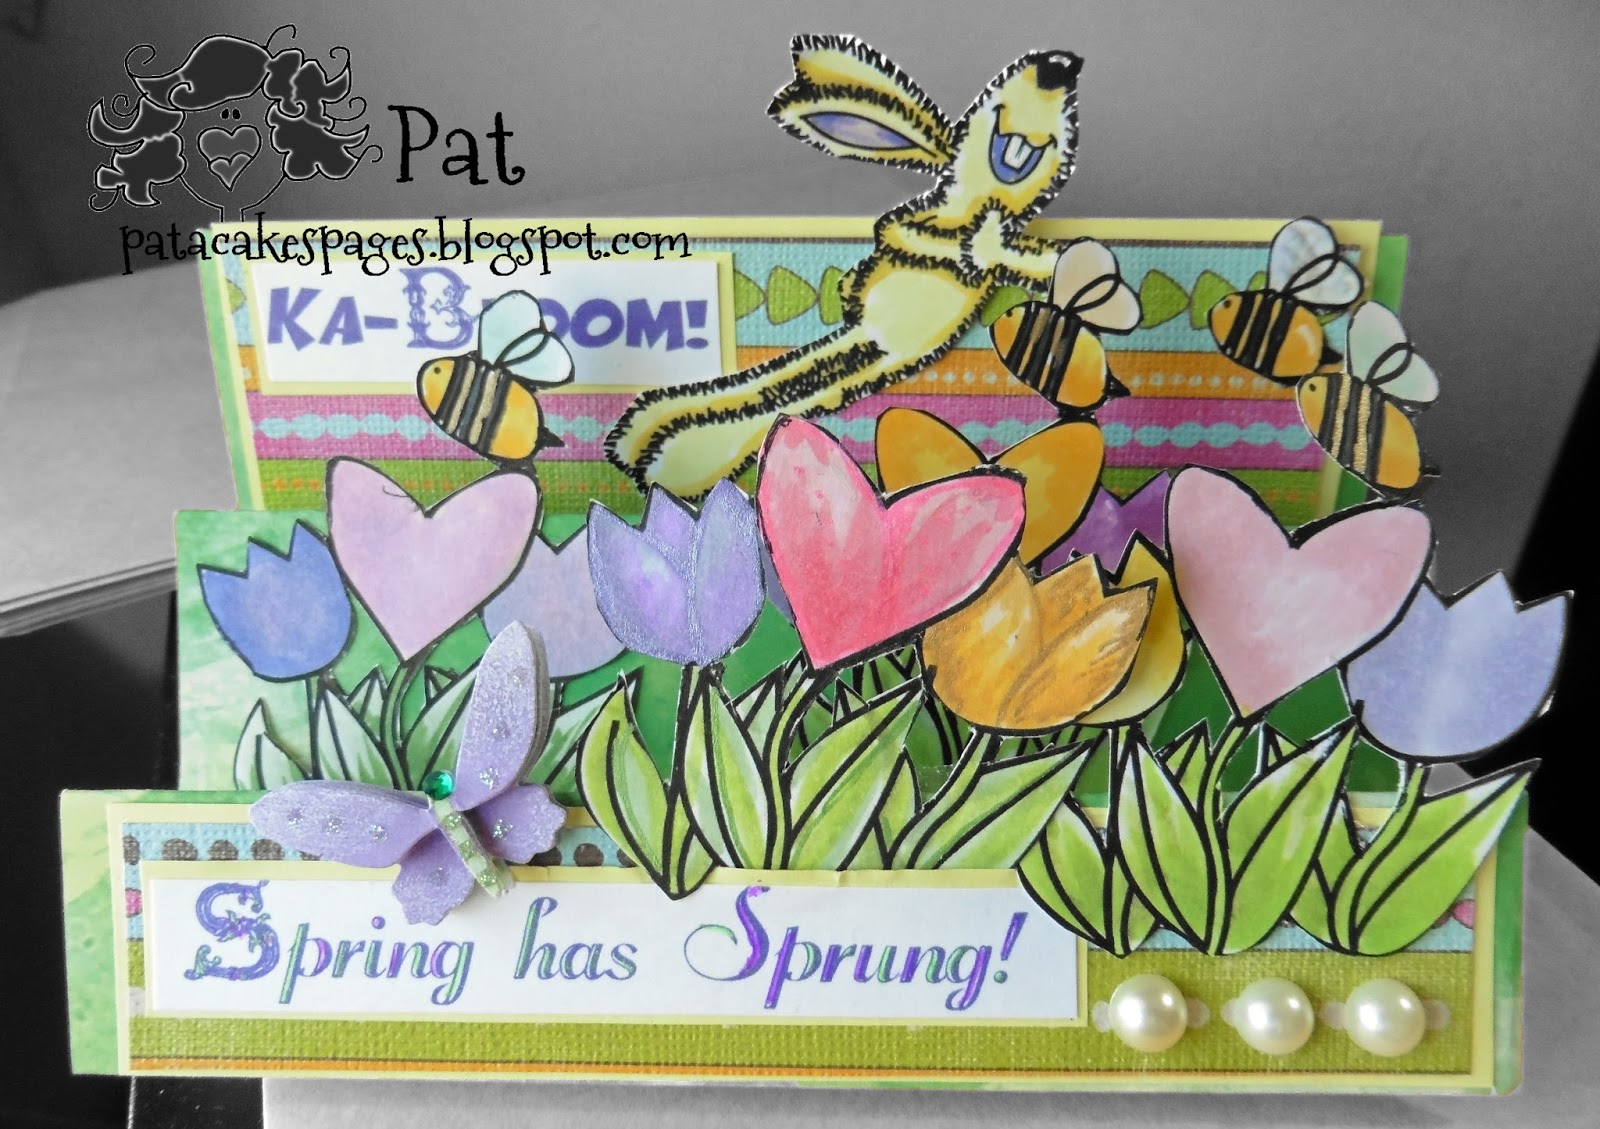
Happy May Day! Here in the US, while not the most popular holiday, we celebrate May Day and the true blossoming of Spring. And at Scribbles Designs Challenge Blog, the challenge continues to be Shades of Spring.
I created a step-card using two cute digi images from the Scribbles store, #408 B Bunny Joy and #648 Heart Tulips. I wanted to show Spring exploding, so I printed Heart Tulips several times before fussy-cutting the images and adding them to the first two "steps" of my card. Between the bees and my Bunny Joy, the card looks like the bunny is jumping for joy over the Spring blooms. Of course, I had to use a sentiment to go with my theme. The sentiment in the back reads: "Ka-Bloom!"

I get so inspired by the digi images at Scribbles Designs. Check out the store and then add your own creation to the challenge for your chance to win free digis!
Challenges I am Entering:
Crafting with Friends - Anything Goes
Creative Fingers - Anything Goes

Wednesday, February 15, 2017

Baby, It's Cold at Scribbles Designs Challenge Blog

Welcome to a new challenge at Scribbles Designs! It's the middle of February, and if you live in the northern hemisphere, that means cold days and colder nights - Brrr! So Scribbles would like to see your creations, inspired by the winter weather.
I created this fun step card using several digi images from Scribbles Designs: Free Snow Sign, Bunny Bum, Cat and Snow Kisses. The edge of each "step" has been sprinkled by faux snow, something you can make by rubbing two Styrofoam balls together and gathering up the "flakes". Except for my background paper, Rolling Hills patterned paper from Decosse's Dynamite Doodles' Snow Much Fun Paper Kit, the rest is from my stash.
What's your winter weather look like? Be inspired by looking out your window and link a project up to Scribbles Designs Challenge Blog for your chance to win free digis from the Scribbles store. See you there!!
Challenges I am Entering:
Creates & Makes - Winter Blues
Show Us Your Pussies - Kitty Love
Crafty Creations - Anything Goes
Crafty Gals Corner - Use your Favorite Things (I love my homemade snow)

Sunday, May 1, 2016

Scribbles Challenge Blog Asks "What BUGS You"

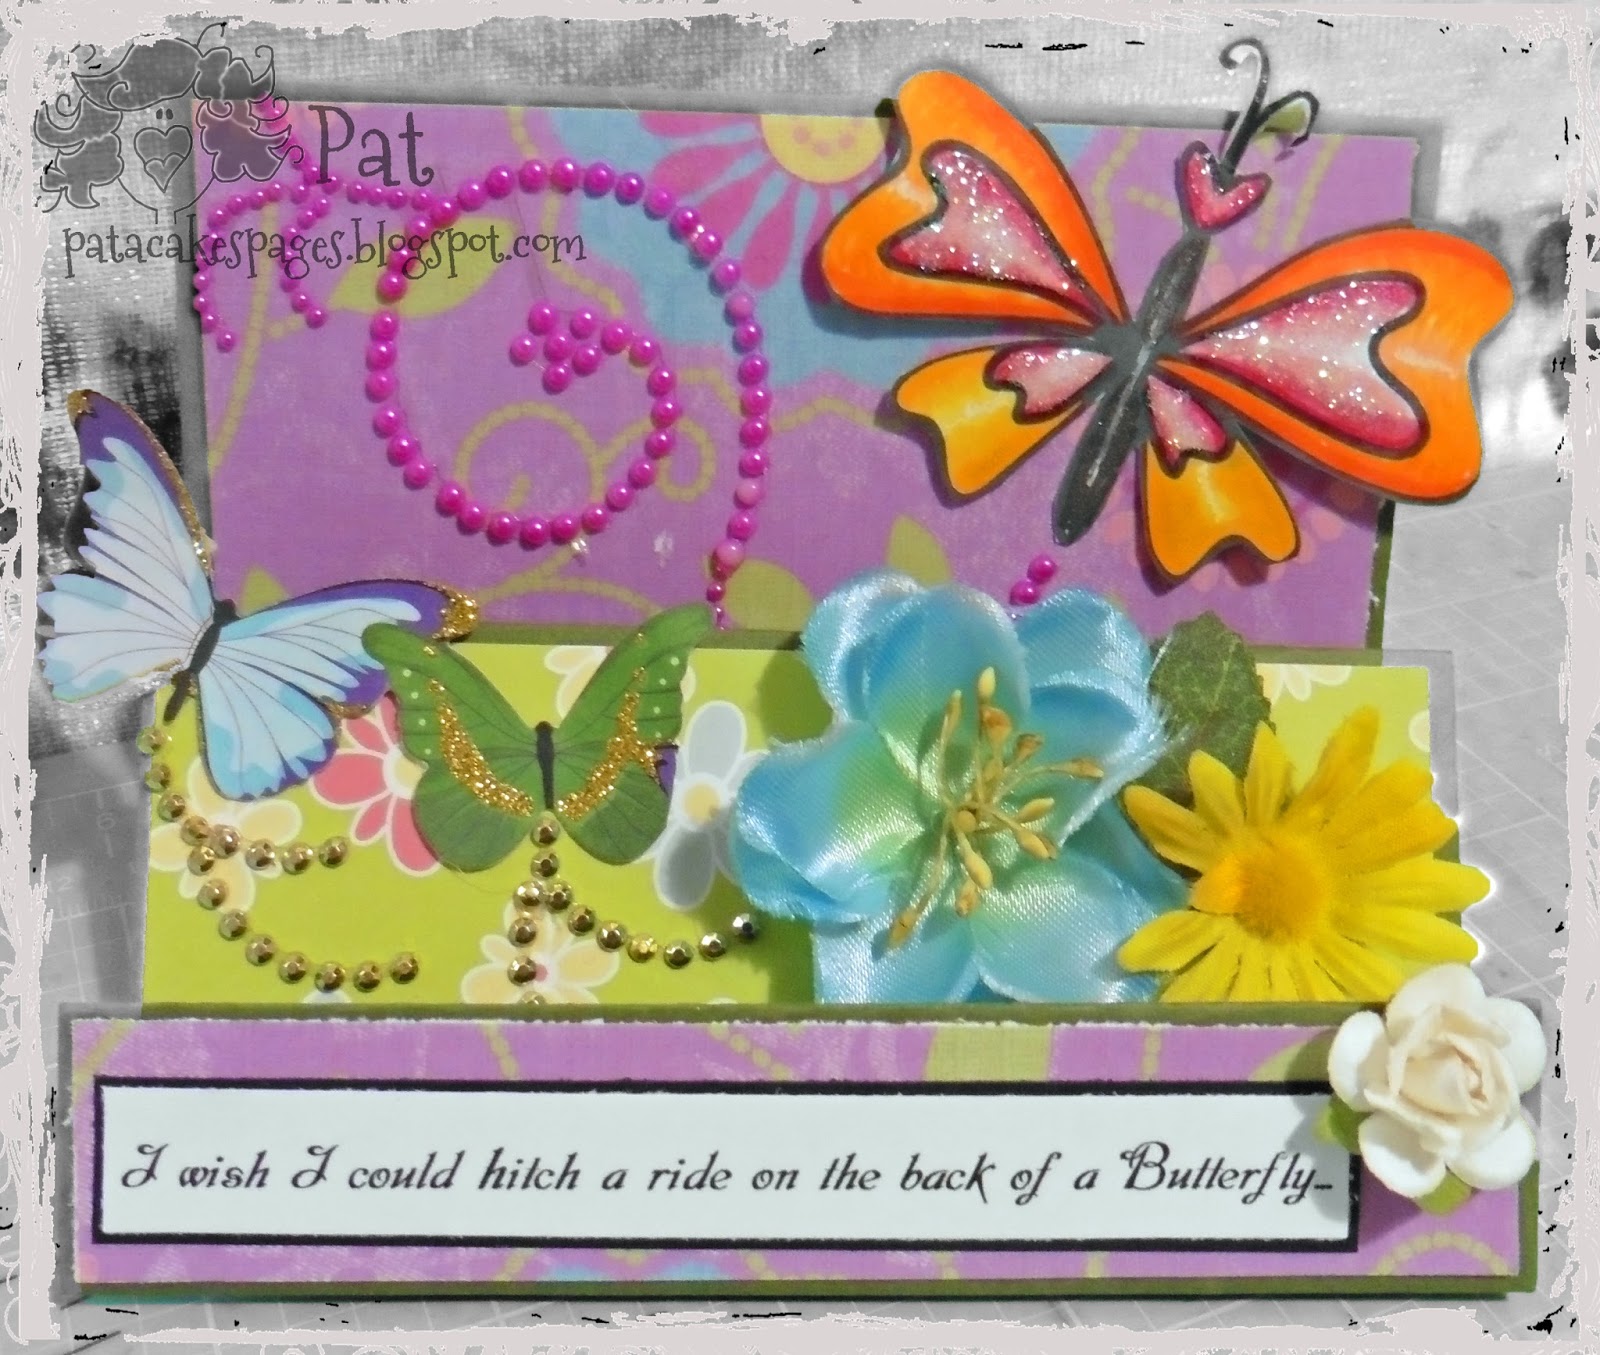
Hello, crafters! We are midway into the Scribbles "A Little Note to BUG You" May Challenge, as well as firmly into Spring, and with the season comes lovely things like flowers and sweet-smelling grass and warmer weather. Spring also brings out all those tiny bugs, the crawling and flying ones. My favorite (practically my only) flying bug is the butterfly, so I created for my DT make this step card featuring a butterfly image from Scribbles Designs. It is called Butterfly 1 and is a Friday Freebie from Scribbles Designs.
I created a Step Card so that I had multiple surfaces on which to place my Copic-colored and Stickle-brushed Butterfly and lots of flowers and flourishes. A butterfly is, after all, a flying flower, don't you think? My sentiment is one I've thought about often, especially on stressful days. I think a nice go-round on the back of a butterfly would be peaceful and fun.
But, back to the challenge...you have until the end of the month to create and link up your card or project at Scribbles Designs Challenge blog for your chance to win prizes (use a Scribbles Designs image and you'll double your chances).
Happy crafting!
Challenges I am Entering:
Crafting When We Can - Add Flowers
Dragonfly Dreams - Summertime
Pile It On - Garden Creatures
Sunny Day Crafting - Photo Inspiration
Just Us Girls - Favorite Shaped or Folded card (I love making step cards-so many card faces on which to showcase images, words & embellishments)

Monday, November 23, 2015

Holiday Baking with Lacy Sunshine at Craft Your Passion Challenge Blog

Chicago lived up to its reputation for fickle weather this weekend. After a very mild November, Bella blew in and dropped 8 inches onto my part of the northwest suburbs--which puts me into a holiday baking mood. And this gorgeous image from Lacy Sunshine, called Pinni Cookie Crumbler, carries my mood into my crafting.
My granddaughter was over this weekend, and we baked a few goodies for our Confirmation Bake Sale. The 8th graders bake for and work the weekend-long sale, and the monies go toward a Christmas Party they host for families in the New Hope Program of Catholic Charities. This is our 8th Annual bake sale and Christmas party, and in Chicago we don't let a little snow get in the way of going to church and supporting our students.
Lacy Sunshine is this week's sponsor over at Craft Your Passion challenge blog, and I used Pinni Cookie Crumbler on a side-step card. I just love the presentation a step card makes! And every bit of my card except for my image comes from last year's holiday crafting leftovers!!
The weekly challenge starts today, so go visit Craft Your Passion for some inspiration, then link up your own Anything Goes project for your chance to win prizes.
And as always, crafters, have fun!
Challenges I am Entering:
Lacy Sunshine challenges - Anything Goes
Crafty Friends challenges - One for the Girls
Alphabet challenges - T is for 'tis the season (tis the season for baking holiday cookies)
Digitally Sweet challenges - All about the Title
Jingle Belles - Holiday leftovers
Cardz 4 Galz - Favorite Christmas Color combo (red & green)
If You Give a Crafter a Cookie - Photo inspiration (I used the color combo)


Thursday, September 10, 2015

Making the World a Sweeter Place...

One year ago, a new store opened at up the local mall. Since that time, my daughter started working there, and I became friends with the owner. This weekend will be the Nothing Bundt Bakery's one year "birthday"
There will be lots of free samples (you don't know YUM until you've had one of their Bundtlets), kids' activities, drawings, etc. The owner has been very generous with donations toward the program in which I work, so I made a very special celebration card for her.
My card is a step-card, so that I had three fun backgrounds on which to pile on the goodies. I colored up a Fred She Said digi image called "I Love You This Much" using my Copics, then fussy-cut her. The sentiments and embellishments were easy--but I knew I wanted her to be juggling baked goods, and without the cardstock behind my image, it was a challenge. I finally decided on wire, then had to shore up her arms so that the cakes wouldn't droop back or forward.

Challenges I am Entering:
Crafty Cardmakers - Floral Embellishments
Karleigh Sue challenges - Ribbon or Flowers
Use Your Stuff - TV or Movie- Inspired (Cupcake Wars on Food Network)
4 Crafty Chicks - Birthday
Seize the Birthday - Anything Goes
Allsorts challenge blog - Lots of Layers
 Simply Create Too - It's a Special Occasion (Birthday!)
Clear It Out challenges - Anything Goes (must use stash)
Card & Scrap - Use Flowers
Sparkles Monthly challenges - More Than One Fold

Monday, March 30, 2015

Anything Goes at Craft Your Passion Challenge Blog

Another week, another Anything Goes challenge from Craft Your Passion. This week's guest sponsor is Doodle Pantry, where it will be very difficult to turn away from all the lovely images and products offered to you.
I got to play with a sheet of images called Dolphins, which includes both black line and colored images, and several sentiments, along with three patterned papers.  In fact, pretty much everything on my card is from Doodle Pantry, except for the two adhesive-backed pearls and the wire strung with fish beads that I liberated from my daughter's bracelet (hey, it was broken). LOL
There was just so much to work with that I decided to make a step card so that I could use plenty of images and papers. I will admit that I used the colored images (it made my life sooo much easier), but then I used the time I saved that way by fussy-cutting them out. I used all three patterned papers, one for each "step" on my card, tearing the paper on the middle step to form waves.
I wanted my card to look in motion, so I adhered a couple dolphins by just their tails so that they seemed to leap out of the water, lending my card dimension. Of course, the boss dolphin in front seems to look right at you, saying the words "Don't just float, make waves." That is one of the things dolphins do best, or so I've heard from people who were "lucky" enough to sit in the rows closest to the water's edge at our local zoo. You could say they were "soaking" in the dolphin exhibition.
You really should check out the Doodle Pantry for inspiration and images. And of course, come join us at Craft your Passion challenge blog for your chance to win!
Whatever you decide to do, have fun!
Other Challenges I am Entering:
Allsorts Challenges - Feature a Creature
Kit & Clowder - Inspired by a Movie (Flipper)
Left of Center challenges - Mermaids/Water
Dragon's Lair challenges - More than 2 Folds
Simply Papercraft - Anything Goes
Ike's World Challenge blog - More Than 1 Image (I used 4!) 


Friday, April 18, 2014

Published Using Squigglefly Image

Doing the happy dance in my craft room! I was asked by Holly Young of Squigglefly to make a masculine card for the upcoming issue in Simply Cards and Papercraft Magazine. My card is in issue #123 (page 54) which will be out in the newsstands on April 24th, 2014 in the UK (I don't know about in the US).
Anyway I made a step card using Squigglefly digi image Recycle Guy by talented artist Fawn Palmer. The image is a new April release and available HERE.

I separated the sentiment that comes with the image into three parts for the three "faces" of my card. Coloring my image with Copics, I fussy-cut him and popped him onto patterned paper. Embellishments include Skittles, arrow brad, ribbon bow and ink. This kind of card lets the recipient stand it up on desk or craft table, and has a lot of dimension.
This is my first publication in a printed magazine, and I feel so honored and blessed to be a DT member for Squigglefly. They have really pushed my creative buttons and helped me grow in my crafting and art. So, a big THANK YOU to Holly Young and all the talented artists whose digi images I adore!!
I would love to see some of your projects using Squigglefly images. This week the challenge at Squigglefly Challenge Blog is to use BUTTERFLIES. Now, my card doesn't show butterflies, but if you use an SQ image and butterflies, you have a chance to win free digi's!

Tuesday, December 10, 2013

I'll Have a Blue Christmas Without You

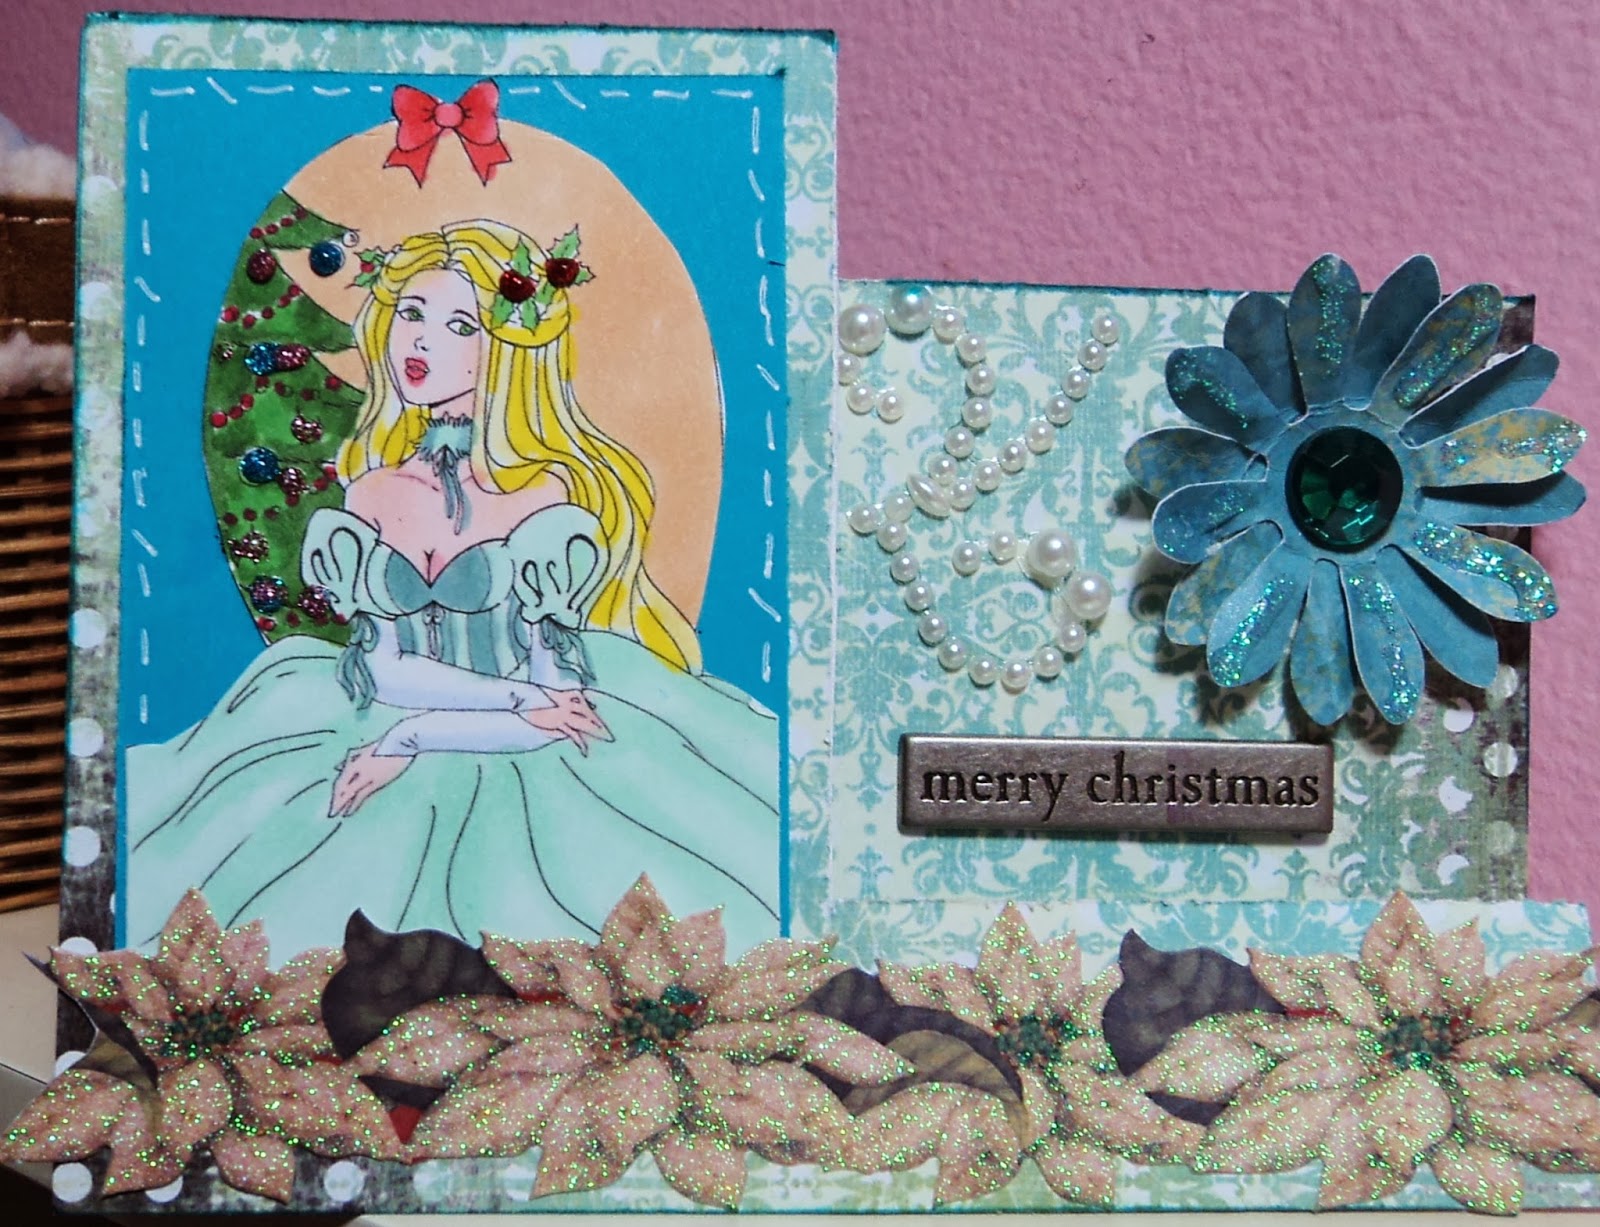
It's getting down to the wire and I still have a few more Christmas cards to make--yikes!1  Luckily I have a bunch of new Christmas images with which to make them, including this darling one from Queen Kat Studios.  Her name is Christmas Girl, designed by Milky Cat Studios, and she looks so blue.  She's waiting patiently for her fiancee.  She's hoping to set the date for their wedding tonight.  She's wondering if she could have everything ready for a June wedding...

But I digress...back to my card.  I decided to make a side step card, covering it with leftover patterned paper and distressing the edges with CTMH "Ocean" ink.   I snagged some beautiful cardstock border stickers from K&Co last year for PENNIES and the white poinsettias are just a small part of the package.

A handmade flower from my crafting friend Shannon (thank you again) brings more teal into my card.  I embellished with a metal brad sentiment and some pearl flourishes, both items from my Christmas stash from years ago.  A smidge of Stickles gives my card a little shine and it's done!

Check out all the new releases at the QKD Shop-there's a sale going on, so get over there now!


Saturday, November 23, 2013

Brian and Sonal and Baby Makes Three


I made my first "dresser card" for my cousin's son and DIL's baby shower.  I stayed up until midnight the day before the party to finish it and package up the present I was giving them a photo of (ordered online and shipping directly to their house).  Then I get the call to go to work--wah!!
So I'll be mailing it all to them instead of seeing them, which is a bummer but can't be helped.  The card was fairly easy to make, just a side step card with extra pieces of paper for the drawers and a punched bottom to give it that "dresser" look.  I made a quick run to Hobby Lobby to get some tiny baby embellishments, but the rest was easily at hand because I am a paperholic and a hoarder of craft supplies.
The sentiment was stamped with a CTMH stamps set, and the embellies are a combo of buttons and stickers.
This is the oh-so-cute baby gift I ordered for them.  It's a hot pink flower of a bath tub, made of plush, machine washable and dry-able material that mold to any sized sink or fits in the bath tub for babies 0-6 months old.  I added some hot pink wash rags to the order.  Can you tell what gender the baby will be???

The baby bath comes in four colors and can be found HERE.  I'm sire I should have ordered the generic Yellow one, as I'm also sure they'll have more than one child, but that Hot Pink is so darn cute and VIVID and their first is a baby GIRl, so I couldn't resist going full hog on the Pink part. LOL

But it wouldn't arrive by the day of the party, so I printed up this photo and made a lovely presentation folder to give to Brian and Sonal, which is the next photo.  Now since I can't go to the party, I bubble-wrapped the card and folder and am sending it out tomorrow.

I covered an over-sized envelope with patterned paper and leftover embellies from the dresser card.
Lots of fun, lots of time, lots of love, but, sigh, no party for me!

Tuesday, April 9, 2013

Just Breathe!


Queen Kat Designs has expanded their line to include digital images!  I am so happy because a crafter has a lot more options with digi's than with rubber (although rubber can never be replaced in my mind).

In order to show you one of the benefits from working with digi's, I made a stair step card using an April new release called "Just Breathe by artist Nora Blansett.  It is perfect for showcasing digital images!!

I printed the image several times in three different sizes.  After I made my step card base, I colored all the flowers with my trusty Copics.  On the back face of my card, I used one 3x5 sized image.  The middle "step"   uses two wallet sized prints, and the front of the card uses four of the smallest prints I can get using Microsoft Windows Picture Manager.

Once the flower images were in place, I embellished the dark blue background, first with inked edges in white, and then adhering some flourish diecuts and pearls for a fantastical "night sky in the garden" look.  I had a leftover metal charm from Tim Holtz Ideology which reads, "Reality has limits. Imagination is boundless."  It was the perfect sentiment to go with my use of Nora's flowers!  Using her digi's, in fact any digi's, erases any boundaries you might have with a stamped image, as you can see above!

A couple silk ribbon roses and a few more pearls and my card is complete.  It can be folded flat for mailing, and then stood up for presentation.  I love the look of this, and plan to give it to my neighbor, who is a Shakespeare fan and loves the play, "A Midsummer Night's Dream".  I like to think that my garden of flowers would fit right in with the fairies and flowers that Shakespeare dreamed up.

Go check out Nor'as newest release, Just Breathe, in the SHOPPE.  While you're there, look at all the wonderful stamps and digi's and tear down those crafting boundaries with some inspiration from Queen Kat Designs.  Once you do, show it to us on the QKD Facebook Page.  Happy crafting!!

Wednesday, September 19, 2012

Spooky Squigglefly Challenge Card

Today I had lots of fun with a cute Squigglefly digi image called Winnie from artist Jane Beljo.  I popped her onto a stair-step card.  This type of card is easy to make, but lots more fun to embellishment!  There are loads of tutorials on PaperCraft planet and Splitcoast Stampers.
I colored Winnie with Copics and fussy-cut her.  Then I started on the scene of her trick-or-treating adventure.  I had some lovely spider web felt fusion border leftover from previous projects, so I used it on the first, shortest "step".  I added some card candy receive in a swap on my Yahoo Group, Your Scrapbook Place.
Next I wanted to set the scene with some 3D stickers I had in my Halloween stash.  That went into the background onto my third, tallest "step".
Then I took my time deciding where to place Winnie, as she is the focus of my card, and I didn't want to lose her.  From there, I added a couple tombstones and some floating ghosts and my card is complete.
I love to make these stair step cards, as their presentation is so pretty, whether it's in the envelope or standing up on someone's desk.  I hope you like my card.  It's going to be entered into Squigglefly's newest challenge, which is to make a Halloween card.  I think my card qualifies, don't you?? LOL
If you haven't started to collect Squigglefly digi images yet, click for some FREEBIES and you will be hooked on their huge offering of cute, realistic, vintage, quirky and/or whimsical images.  There are images for everyone and anyone's card making tastes!  Then enter your card into the Squigglefly Challenge Blog for a chance to win free digi's!!!  Free and free, that's my kind of challenge!!
Meanwhile, crafters, have fun with the season and keep crafting!

Saturday, September 1, 2012

A Watched Pot Never Boils

And isn't that a lucky thing for this little ghoul?  Since he almost looks like the main course, or at least the main ingredient!!

This cute image is called Cauldron Congregation and it is a September Queen Kat Designs new release from artist Coriander Shea Detwiler.  It was love at first inking when I opened up my QKD envie and found him.
I knew I had to make a special card for his first debut, so I made a Step Card.  Have you made one yet??

If not, it's very easy!  Just cut a piece of cardstock to 5-1/2"x12".  Then, placing the cardstock horizontally, score at 1", 2", 4", 6", and 9".  From the end starting with the 1 inch scores, fold in and then out, mountain and valley folds, so that you end up with three "card fronts" of ascending height.

From there, you can cover with any patterned paper, stamped image and embellishments that strike your fancy!  For my card, I had some fall leaves patterned paper that I used to cover my three "card fronts" in varying heights. I fussy-cut the leaves at the top to give it some fullness and shape.

On the first, shortest front, I placed my Halloween sentiment, "Eeeek A Ghost!"  I added a spider and a black pearl on each end, and replaced the letter "O" with a googly eye.

On my second front, the one on which I personally like to showcase my stamped images, I colored Cauldron Congregation with my trusty Copics.  I added a few more colored ghosties and adhered them with dimensional dots for an even more 3D effect.  A painted wooden gravestone sits beside the unlikely gathering.

The tallest card front, or my background piece, sets the scene, with an extra ghost from the stamp.  In addition to it, I stamped QKD's Steampunk Butterfly and gave it Halloween coloring.  I couldn't help myself,  I had to add a googly eye to the body of my beastly butterfly.  I think it lends the card a more, well, unique look, don't you?

When you try this step-fold style of card, have fun with it!  And check out the QKD Shoppe for some killer Halloween stamps.  When you receive your new stamps, make sure to check out the Facebook Page to sign up for our 13 Days of Halloween Customer Blog Hop!  Fun, inspiration and prizes will definitely put the treat in your crafty trick-or-treating!!