PagesPat's Ponderings

Showing posts with label pearls. Show all posts

Sunday, November 2, 2025

Almost Got a Full Box of Birthday Cards Now


Getting close to another year over. I know my box of birthday cards id filled to the brim again. I got smart this year and every time I finished a card, I put the envie with it so people browsing my collection could pluck one out of the box and I wouldn't have to hunt for an envelope that fit.

I created this one with a pre-cut card base, covering the front with DP The sentiment is from Squigglefly, and reads "It's a Big Dill" on the inside". I know, where's the pickle to go with the pun. I just thought it worked with the ageless beauty of the women on my card face. 

CHALLENGES I AM ENTERING:

Friday, December 15, 2023

24 Days of Christmas - Day 15 - Front Door Decor


I am just powering through my Christmas craft stash! Today I took out this metal hanger. The only things it held were dusty greens, so I refreshed the bunch and added gold and silver ornaments and red balls/beads. I decided to go with the original red slightly tarnished or aged color. Onto it, I adhered strings of pearls on the front. I also added a goldish bow and a hanging, uh, thing? It's a tiny ornament from which a tassel is attached. One lone pearl rests in the middle of my hanger and I am finished.

This was a quick make, since the frame of my project was ready to embellish. I love finding metal designs that I can alter, paint or embellish. I find loads of them at thrift stores at decent prices. This was a purchase I made last year and put away. You can find some great deals both just before and after the holidays.

Friday, December 8, 2023

24 Days of Christmas - Day 8 - Holiday Greetings for My Neighbors


 Here's another one of my holiday gifts for neighbors. It's called a mussie tussie, and was popular several years ago. I think it's a perfect gift for those neighbors who mean a lot to me. They know I'm a crafter and expect something homemade.

I started with a toilet paper roll (any cardboard tube will do) and wrapped it with designer paper. Then I added some frills around it - lace, button, bow, etc. From there I chose trinkets to put inside. I have a wooden nutcracker ornament, candy cane, snowflake buttons and a string of crafting pearls.

I already dropped off my first mussie tussie and now I'm ready to deliver this one. Since I have quite a few yet to craft, I think I'll show off the rest (once they're made) in one post. I have a lot more crafting ideas bubbling in my brain. time waits for no crafter!


Monday, December 4, 2023

24 Days of Christmas - Day 4 - Holiday Mussie Tussie


Does anyone remember when Mussie Tussies were popular? I even facilitated a craft workshop for Valentine's Day back in the day. Well, I'm bringing them back this Christmas. Inspiration hit me one night as I was sitting and contemplating my polished nails in the bathroom. I saw an empty toilet paper roll sitting NOT in the trash basket and, well, here is my finished project.

First I covered my cardboard troll with designer paper (I believe it's from DCWV), one end extending from the stapled-closed bottom; I cut 1/2" slits in the paper before folding them over the top opening, and adhering it all with spray adhesive.

I added a piece of coordinating paper to the bottom, the houses and snow-covered ground adhered to the bottom to make my little scene. To give the bottom a little dimension and shine, I added a line of pearls. Up top, I ringer slightly larger pearls and added the silver bow.

I had to stuff the bottom of my Tussie with tissue paper so that my tiny gifts could be seen when hung up. If you zoom in, you can see the Christmas tree, candy canes, snowflakes, star and kitty. I used a piece of leftover lace with which to hang my ornament/wall decor/holiday gift. 

Last Christmas I decorated cardboard book boxes, filled them with handmade trinkets and gave them to my neighbors. This year they'll get my Mussie Tussies with a tag, in place of a card.

Sorry I missed yesterday's make. I had just returned from a 2-week cruise. I had crafted the forst 2 projects before I left, but didn't have time before nor after to get yesterday's made and posted...

Saturday, October 21, 2023

31 Days of All Hallows Eve - Day 21 - Day of the Dead Skull

 Today I decorated a Dollar Tree skull and created a sugar skull for Day of the Dead. Anyway, this holiday is getting more popular in the US, especially with movies from Disney like the "Book of Life" and "Coco". It originates from Mexico, and really is more related to the Catholics' All Saints Day and, more so, All Souls Day. It is a day to honor those who have passed before us, except instead of going to church to pray for their souls, families gather together either at home or where their loved ones are buried. They celebrate with flowers and food and bring up good memories, celebrating their lives so they won't be forgotten.

The skull I found was colored with a bokeh-effect over the color silver. I filled the eyes with adhesive jewels, then surrounded each eye with a circle of yellow jewels, and another of pink pearls. After looking it over, I decided it was much too sparkly, so I attached a flower into each socket - much better...

As I filled the face of the skull, I added jeweled flowers, lines of pearls and jewels and finally flowers to cover the scalp. I had to use my Posca paint marker to color the nose socket black, as well as outlining the teeth. My partner, the hot glue gun, was a huge help! LOL

Since the teeth were the swirly rainbow on silver color, I painted them white. My sugar skull, named after special candy sold only on November 1-2, is a bright, beautiful decoration. If I display it my window, it really sparkles in the sun!

CHALLENGES I AM eNTERING:

Crafting Happiness - Halloween 
Simon Says - Spooky

Monday, June 5, 2023

Patterns Are Fun!

The optional twist at the Path of Positivity challenge blog is to use pattern. I pulled a digi paper from my collection of Decosse's Digital Doodles. This is paper you can print out and/or create a digital card. I printed mine out.

Using dimensional tape, I gave my Scribbles Image some pop. The image is called F185 Wooly Wink and can be found HERE. I created the sentiment on Photoshop Elements (I finally upgraded to the 2022 version). The font is called Postino Std Italic.

The paper's polka dots really sang to me, so I wanted to continue the dots with the five adhesive re d pearls. The card seemed very simplistic to me, so I added a paper doily behind the dotted aper and added a strip of cording.

The Path of Positivity offers monthly challenges and the twists are always optional. I hope to see you at the challenge blog!

Monday, March 20, 2023

Path of Positivity New Challenge Card


I am all about spreading positivity in the world. Right now, a very close friend needs support with things going on in her life. I'm sending her love with this card, which is designed using the Path of Positivity challenge blog's Mood Board.

I had the perfect papers and "accessories" for this card, but it looked very dull. So for a little color, I added lilac cardstock and was happy. The sentiment is from Scribbles Designs. After framing it, I added the bow. Still so plain! So I rummaged thru my lace leftovers and adhesive bling and found things to complement the card design. I like it and I hope my friend will feel the love.

Don 't forget to enter the Path of Positivity challenge this month. It's always Anything Goes, but it's nice when crafters get inspiration from their offerings. Hope to see you there!
Challenges I am Entering:
Atlantic Hearts Sketch - 
Make My Monday - Spring Colors


Monday, November 18, 2019

Thankful for Good Friends on the Path of Positivity


When my son got married, her parents and my husband and I started a friendship that, just like marriage, became stronger as time went by. We even took a cruise together before hubby became too sick to travel. He's gone now, but I'm so thankful that we have and continue to get along so well together.
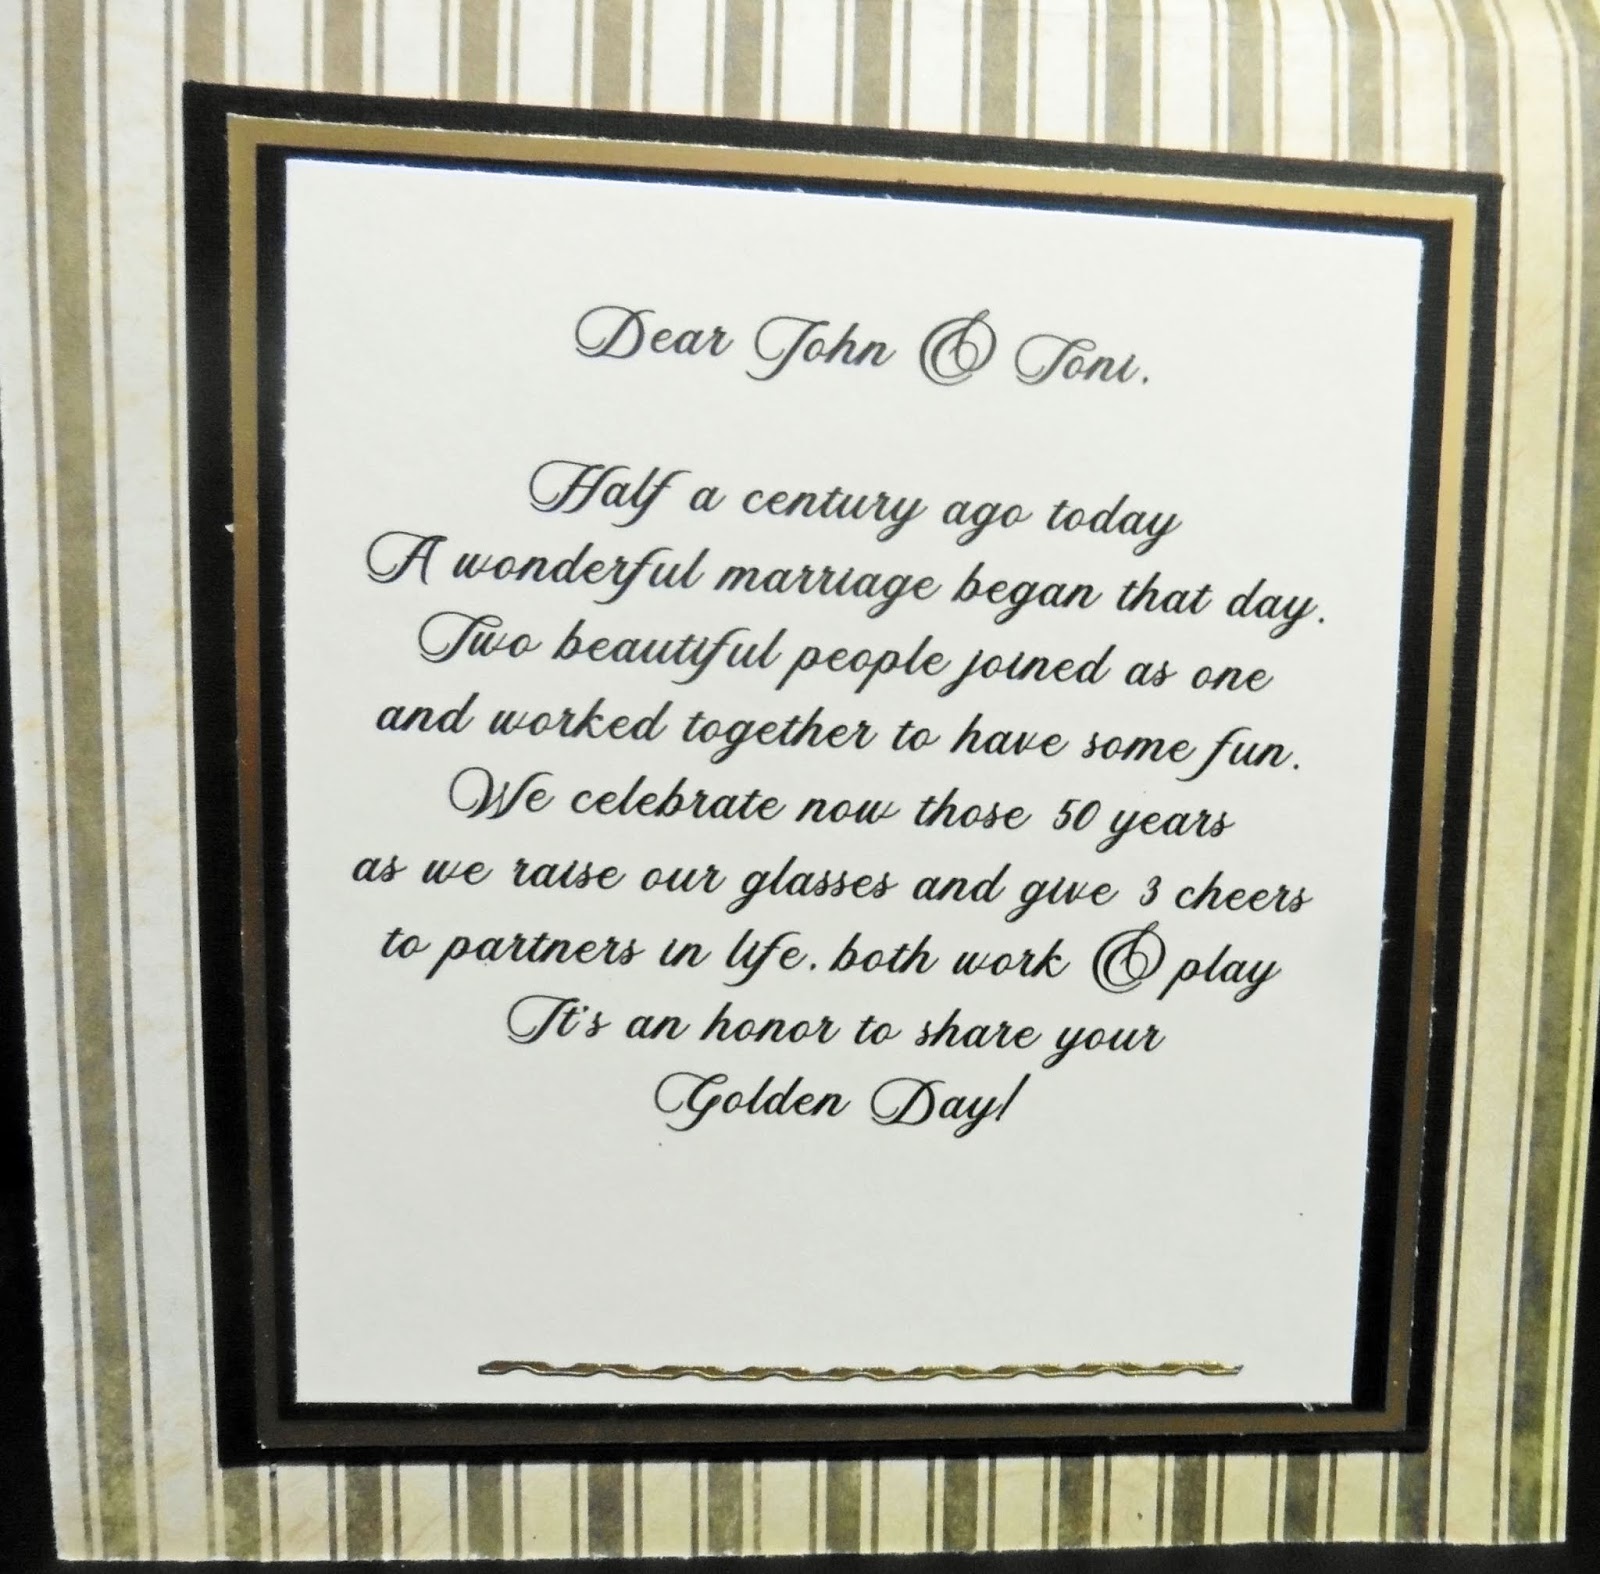
I'm also thankful for being able to celebrate their 50th wedding anniversary this month. I created this card for them using a digi image from Scribbles Designs, one of the guest sponsors for the Path of Positivity Challenge Blog. The image is called Champagne Glasses, and it's a FREEBIE! I used Copics to color the image and pulled out all the gold papers and embellishments I could find from my stash to create the rest of the card..
 I decorated both faces on the inside of the card as well as the front. I found the perfect quote (top) and an awesome poem to congratulate them. The font I used is called Violetta.
I am sure they will like the card, as Toni (the other MIL) is a frequent customer when it comes to cards. In fact, she was over the moon last Christmas when she opened her gift from me - a dozen handmade cards. 
You have until the end of the month to create and link your project to the Path of Positivity challenge blog for your chance to win the following prizes:

Challenges I am Entering:

Monday, October 21, 2019

It Takes Courage to Walk the Path

When was the last  time you tried something new? I mean, really stepped out of your comfort zone? It takes courage to take risks. Then again, if you never challenge yourself, you may miss the thrill, the empowerment, the satisfaction of trying something new. It could be a new crafting technique, travel, a new relationship, or going back to school.
Courage is the optional Twist at the Path of Positivity challenge blog. I created this card using an image from one of this month's guest sponsors, Beccy's Place. It's called Nell on a Bicycle. And like Nell, I've started riding my bike again around the neighborhood (minus the bare feet and pearls). It feels great - fresh air, exercise and talking with neighbors.
I also tried a new (to me) fun fold while creating my card. I cut my cardstock into a triangle and then measured out the card size, folding one point down and the other point in.
I added patterned paper to each "half". After coloring Nell with Copics (shown below), I adhered her to the top half of my card so that it would swing up easily. I also added a couple fun phrases and some adhesive-backed pearls. I wrapped a piece of cardstock around the card to keep it closed.
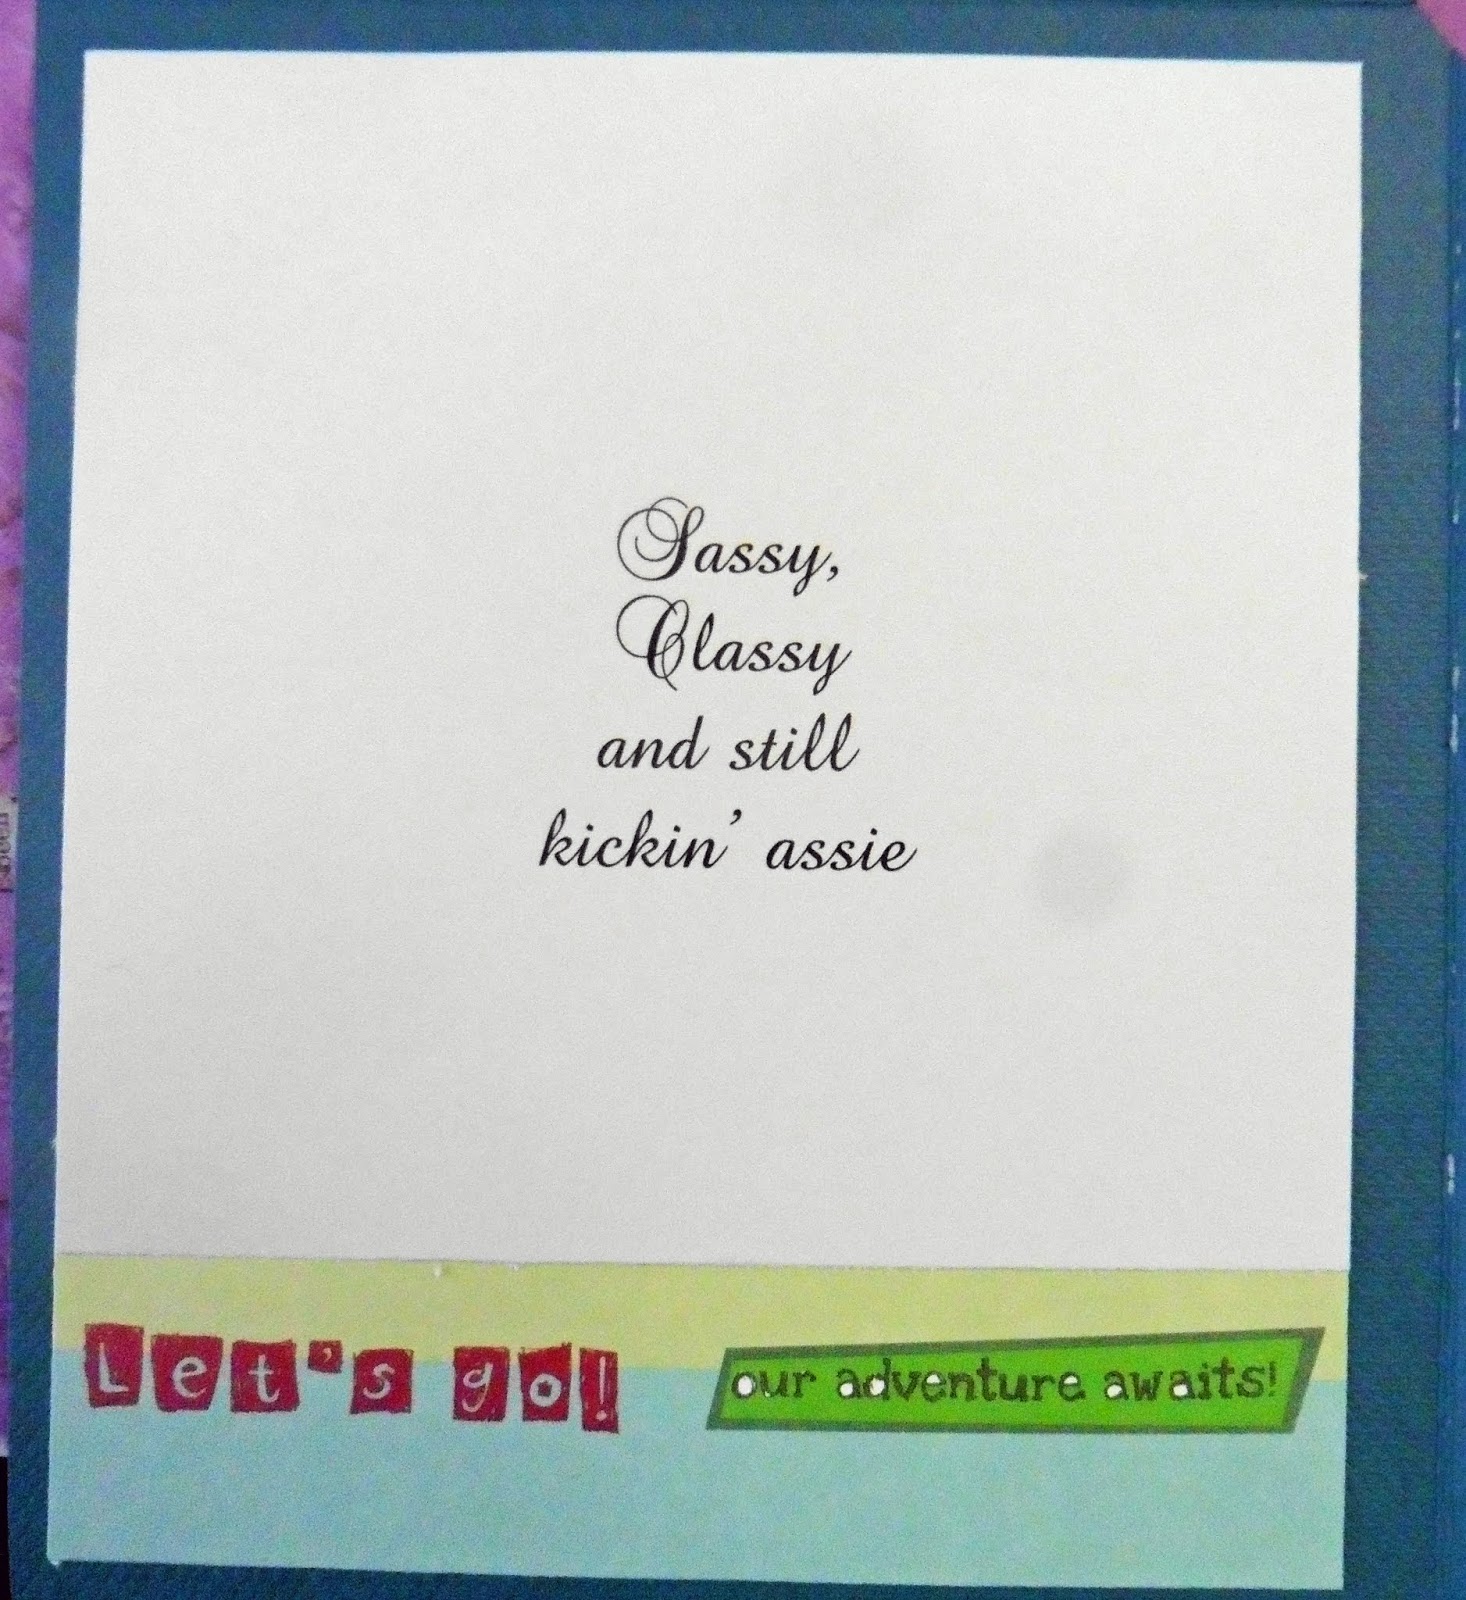
The sentiment inside describes Nell to a "T".
My girlfriend's birthday is coming up soon. Nell could be her twin in spirit, because that girl is Sassy, classy and still kickin' assie. She is always ready for adventure outside of her comfort zone.
The Twist this month at the Path of Positivity is for inspiration and fun. As  long as projects are encouraging, inspiring or positive, they all qualify for this month's prizes:

  • A $10.00AU gift certificate to Beccy's Place for the person chosen in a random draw based on all qualifying entrants.
  • ONE image (value of $5 or less) from Scribbles Designs, for the post or project that the team deems most inspiring of the bunch based on all qualifying entrants.
  • One digital image from Creative Bug Digital SnapShots for each person chosen as a DT Delight.

    Good luck and happy crafting!

Sunday, September 1, 2019

Getting Sentimental at Scribbles Designs Challenge Blog

Today's card is my DT make for Scribbles Designs. When I saw this digi image from the Scribbles Designs Store, called #146 Moon & Stars, I knew I wanted to try creating a scene like I've seen online. I took my Copics and a square of white cardstock and started coloring the night sky. When I was happy with it, I flicked white paint onto it for the smaller stars.
I wanted to make the "land" part enough of a different color but still keep the moonlight effect. Once I accomplished that, I drew in the tree silhouettes and added white gel pen for the moonlit branches. Then I could go on to making the sentiment and adding a few embossed stars and a line of pearls for embellishment. And my card is finished!
The optional theme at Scribbles Designs Challenge Blog is to feature a sentiment on your card. That's easy for me, as I almost always add a sentiment or greeting to all my cards. One lucky participant in the challenge will win a gift certificate to the Scribbles Store. What a treat! I love the digis from the Scribbles Store! You will too.


Thursday, July 25, 2019

Christmas in July at Bugaboo Stamps - Day 2Another

Day 2 of Bugaboo Stamps' Christmas in July celebration offers a sketch challenge AND a holiday movie to inspire crafters to create.
The movie is called "Jingle All the Way" so my card's sentiment inside reads:
The image I used is Bugaboo Stamps' "Crabby Catmas". I colored my kitty with Copics, colored in a double oval frame and placed it to match the sketch provided. A short line of pearls on the edge at top and bottom finishes off my card.
The movie's story line is of a dad who, forgetting to pick up the toy his son wanted for Christmas, is forced to try to find it on Christmas Eve (along with hundreds of other parents). I remember the year Tickle Me Elmo was THE toy for Christmas. I was lucky to pick one up on Black Friday, before the demand for Elmo reached its peak. My daughter was thrilled!
That's it for now. I'm running behind on my cards for this special Bugaboo challenge, so good luck if you plan to enter, and happy crafting!
Challenges I am Entering
Catch the Bug - Day 3
Crafting by Designs - Ready for Christmas?
Crafty Gals Corner - Christmas in July
Show Us Your Pussycats - Furrything Goes
2 Crafty Critter Crazies - Anything Animal Goes
Crafty Animals - Anything Animal Goes
Craftyhazelnut's patterned paper - Anything using pp Goes
CCC Digi Creations - Christmas in July
Merry Little Christmas - Anything Christmas Goes
Sheepski Designs - Early Christmas/Winter
The 12 Months of Christmas - AG + Optional PLAID
My Crafting Corner - Christmas in July


Monday, April 15, 2019

Fairy Magic at the 12 Months of Christmas Challenge Blog

Christmas is a magical time, so what says magic more than fairies? The optional twist for this month's challenge at the 12 Months of Christmas is Fairy Magic. The DT got to play with images from A Day for Daisies. There are the most gorgeous images at the store,including this one called "Talking to the Moon Fairy."
I tried something new today. I placed my image onto my digital paper and printed it so that it was one single layer.I still got to color the image with Copics. I popped up my "scene" with dimensional tape, using some leftover lace for a border. Then I plundered my stash of jewels and pearls to hang off  my moon. Funny thing about my patterned paper: I used Decosse's Dynamite Doodle's Blue pp from "A Touch of Frost paper kit, but my printer chose that exact moment to run out of ink. It's supposed to be ALL blue, but you know what, I kind of like that "fade into purple" look, don't you? LOL
As for the challenge at the 12 Months of Christmas blog, remember that you don't need to follow the twist to link up your cards and earn a free paper each month nor for a chance to win an $8 gift certificate to the A Day for Daisies store. 
You simply need to follow the twist if you'd like a chance to win this month's featured digital paper pack, Frolicking Fairies: Winter Edition from Decosse's Dynamite Doodles.
   All you have to win these awesome prizes is to remember to link up your card to the main blog!! So have fun and good luck!

Challenges I am Entering:
Winter Wonderland - Cute Christmas
Fab & Funky - Fantasy
ABC Christmas - H for Hang it up or I for Intricate 
(I chose the Moon hanging in the night sky)
Merry Little Christmas - Anything Christmas Goes

Thursday, March 1, 2018

Scribbles Goes for Green This Month

We're at the midway point of Scribbles Designs challenge this month. The theme is Go for Green, so I chose the brightest piece of cardstock I could pull out of my stash.
I colored up a gorgeous doodle image from the Scribbles Store. It's called Peekaboo. I colored it with Copics, coloring past the edges so I could highlight them with white gel pen dots before cutting my image out and popping it on the cardstock.
I liked the white  dots so much I went around the edges of the green cardstock as well. Of course, then I had to do the same with my sentiment but in blue.
I framed it all with blue cardstock and popped it onto a DCWV card from my stash. A few adhesive=backed pearls and a chipboard button and my card is complete. The inside of my card reads: "I hopes it's a purr-fect one"
There are two weeks left to create something green and link it up with Scribbles Designs challenge blog for your chance to win digis from the Scribbles Store. Good luck and happy crafting!

Monday, February 5, 2018

Hurray for Holley


I have a very good friend who is celebrating 8 years of "new life" after brain surgery. You can read her story HERE. I have only met her online but Holley has inspired me in so many ways. During the month of February, she is posting crafting questions and giving away prizes every day on her blog. One of her many sponsors is a favorite of mine, Sandra Caldwell Babycakes dnd.
Here's a card I created with one of four Celebration Sale digital images Sandra is offering this month. The image is called  1712 Doctor Hippo and I just love that she has hung up her "Hippo-cratic Oath" certificate on her office wall, although she needs to straighten it before her patients come in. Hippos are but one of Sandra's cute characters in her store. I have dozens of her images. I think my favorite one is of the three Stooges, although I have quite a few of her Santas (love them too).
Anyway, if you would like to have some fun and also wish Holley congratulations, go on over to her blog. Besides a lot of inspiration,you just might get lucky!

Monday, May 1, 2017

Spring Has Sprung at Scribbles Designs Challenge Blog

Happy May Day! Here in the US, while not the most popular holiday, we celebrate May Day and the true blossoming of Spring. And at Scribbles Designs Challenge Blog, the challenge continues to be Shades of Spring.
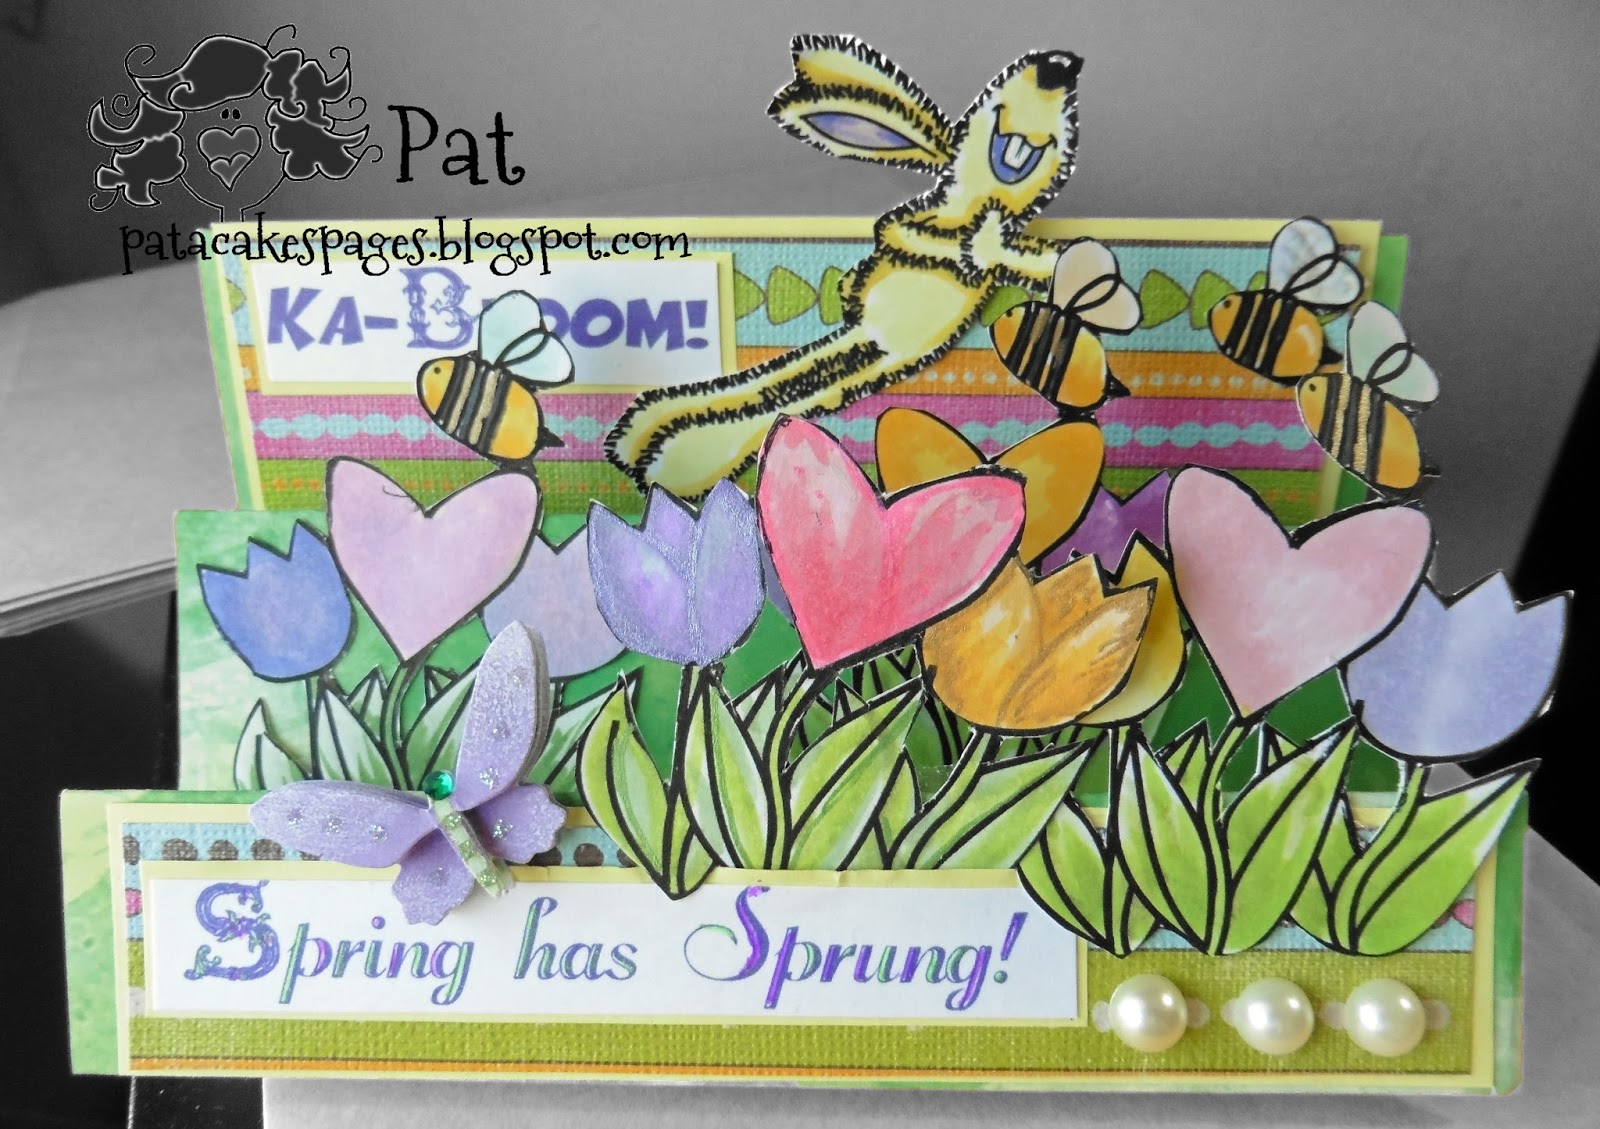
I created a step-card using two cute digi images from the Scribbles store, #408 B Bunny Joy and #648 Heart Tulips. I wanted to show Spring exploding, so I printed Heart Tulips several times before fussy-cutting the images and adding them to the first two "steps" of my card. Between the bees and my Bunny Joy, the card looks like the bunny is jumping for joy over the Spring blooms. Of course, I had to use a sentiment to go with my theme. The sentiment in the back reads: "Ka-Bloom!"

I get so inspired by the digi images at Scribbles Designs. Check out the store and then add your own creation to the challenge for your chance to win free digis!
Challenges I am Entering:
Crafting with Friends - Anything Goes
Creative Fingers - Anything Goes

Tuesday, April 18, 2017

Ike's World Challenges Celebrates Easter and Spring

It looks like Mother Nature has finally settled down into a new season, Spring. Nature is always a great inspiration for art in any form, so it makes sense for Ike's World Challenge Blog to offer an optional twist of Spring or Easter to its Anything Goes theme.
Everyone in my family knows I am a comic, so I created an easel card featuring flowers and bunnies, but...I had to twist it into a punny card. I think easel cards make the best riddle cards to deliver that punchline, don't you? So, do you know how many rabbits it takes to change a light bulb? 
One! If it hops right to it! (If you groaned, then my pun was successful) I used two images from Ike's Art, Bunny on Shelf and Smashing Idea. Instead of trying to color in the light bulb, I decided to keep the image uncolored but print it on white copy paper.
You have until Sunday to link up your card or project at Ike's World Challenge Blog. The theme is optional and you may use any images you like to play along, but if you use an IKEsART image, you will be entered twice into the voting for a gift certificate to the store. Happy crafting!  

Monday, August 1, 2016

A Blooming Challenge at Scribbles Design Challenge Blog

Scribbles Designs challenge blog wants to know "how your garden grows." This is an open-ended challenge (vegetables, herbs, flowers, weeds? LOL).
I got to play with a Scribbles Designs’ digi image called Heart Tulips. 
After designing my card, I framed it with Decosse's Dynamite Doodles' Glitterati Paper Kit in Blue
Elements used in my digital card are:
Pixel Scrapper Janet Scott’s Winter Woodland Wood Journal Card & Reflections of Strength Blue Pearl; Pixel Scrapper Amanda Brown’s Waiting to Bloom Flower; Pixel Scrapper Sharon Reid’s Shine Teal & Gold Butterfly.
The font I used is called Leathery Soft.
Any type of projects are welcome at Scribbles Designs challenge blog as long as you follow the theme. Let's see what grows in your garden this fortnight!


Monday, June 27, 2016

Anything Goes at the Outlawz Greetings Challenge This Week

Welcome to the last Monday of the month, where it's Anything Goes at the Outlawz Monday Greetings challenges. This week's guest sponsor is SLS Lines, and I got to play with a digi image called Goth Girl w/Goldfish & Balloons.  She looks a little sad, or at least thoughtful, so I created a "Thinking of You" card that I can personalize for a long-distance friend I am missing, someone who needs a cheerful note, or even a get-well card.
I colored my image with Copics, using white and metallic gel pens for a little shimmer. Then I fussy-cut her out and framed her with a paper doily. I placed an embossed piece of cardstock on my card face to pull the colors together, adding some black ink on parts of the embossed "bumps." 
I embellished simply with pearls, ribbon and a single black square jewel.
So, what are you going to create for the Anything Goes theme this week? whatever it is, don't forget to link up at the Outlawz Monday Greetings Challenge for your chance to win some awesome prizes from our sponsor, SLS Lines. and as always, crafters, have fun!

Monday, June 20, 2016

Life is a Phantasi at the Outlawz Monday Greetings Challenges

Welcome to the Outlawz Monday Greetings new challenge. This week crafters are asked to create using a new technique. The guest sponsor this week is Digi Stamps 4 Joy, whose digital image, Phantasi 7 is showcased on my card today. Isn't she lovely?
My new technique is using some fancy die-cuts I colored with Copics to frame my card. Usually I stick to my Nestabilities dies that don't take twenty minutes to get out of the dies and trim them. But it does look nice on my card. LOL
Inspired by the feathers in her hair, I embellished my card with feathers, and added a line of pearls as well. I created this card for my granddaughter's graduation, and she loved it! Of course, it came with an altered container topped with a grad cap which, when pulled off the top of the container, was followed by a number of one dollar bills taped end to end. It presented an almost endless ticker tape of money, so who wouldn't like that?!
So what technique have you been wanting to try? Do it this week and show us your project. Just link  up with the Outlawz Monday Greetings challenge for your chance to win digi images from our sponsor, Digi Stamps 4 Joy.


Tuesday, May 17, 2016

Inspired by Embossing at Ike's World Challenge Blog

We've reached the midway point of the Embossing challenge at Ike's World Challenge blog. I created my card with both dry and heat embossing, distressing the edges for an "old world" flare. I colored my image, called Flamenco, with Copics before framing her with lines of pearls and a paper doily. Of course, I like to use any excuse to embellish with a feather, which finishes off my DT card today.
By the way, my dancer is holding castanets in her hands. I picked up a pair just to try out years ago. It may look easy from the audience, but after weeks of trying and failing, which included a demonstration from my cousin (who dances flamenco with Fuego 2000 Dance Troupe), I gifted them to her. She is amazing at her art!
Hope you have a lovely week crafting. If your project includes embossing,, be sure to link it up at Ike's World Challenge blog by the 23rd! Good luck!
Challenges I am Entering:
Use Your Stuff - Heat embossing
Creatalicious Challenges - Anything Goes w/optional: No designer papers