PagesPat's Ponderings

Monday, August 5, 2013

Hey Big Boy, I Got a Card for You

Our wedding anniversary is coming up in September-37 years!!  I can't believe we've made it this far.  I can't believe we haven't called it off, nor that we haven't killed each other.  So many of our friends are divorced.  Luckily, none of them have resorted to murder.

We've been through good times and bad; five moves throughout three states; arguments over home renovations, bringing up the kids and money; weddings, funerals, Baptisms, graduations, and loads of birthdays--together.

Our first date was at the Santa Cruz Beach and Amusement Park.  As far as I was concerned, the sun and sand weren't the only things HOT that day. This memory was the inspiration for my card featuring an August new release from Squigglefly.

Fawn Palmer is the talented artist of 50's Sunbather digi image, which comes with a sentiment that I didn't use on my card.  I used leftover papers from my stash, a pattern for the background, and some fussy-cutting for the border and sentiment frames.

I colored Fawn's image with my Copics, then fussy-cut her out and used dimensional tape to attach her to my card front.  I printed my own sentiment (to my hubby) from my computer onto transparency paper and cut and attached it all onto the flip flops.  I embellished with a few colored and shaped paper clips.

I'm hoping that this card will bring back that beach memory to my hubby, but I won't hold my breath.  He's not famous for his memory of dates, but then again, that's not why I married him.  And evidently, the reasons I did marry him are good enough, at least for the last 37 years!

I'm also hoping that my card inspires you to join in the Squigglefly Challenge.  This week's theme is Masculine card using a Squigglefly image.  Check out the inspiration at the blog, then go create your card for a chance to win free digis!!

Sunday, August 4, 2013

Believe

For the longest time, I stayed away from acrylic paints.  I was more than happy with making cards and scrapbooking memories, stamping and coloring and stickering, etc.  But after seeing some amazing canvas, mixed media and art journaling, I really wanted to stretch my wings and, well, not fly, but certainly paint!

I took to it like a duck does to water--well, not really, it has been a challenge, but I am liking the things I do now, including what I'm showing you today.  I finally have a chance to show off the last canvas I created.  I made it for my baby's graduation--from high school!
After covering the canvas with paint and some tie-dye designer napkins, I printed some monogram letters from the internet to spell out the word BELIEVE.  I adhered some of those letters to squares of foam board for a little dimension, and colored, embellished and/or distressed each letter before attaching them to my canvas.

Then the fun began.  I wanted a quote that was a personal message from me to her, and found part of one in a poem.  I painted that quote, as well as painting/writing special, tiny messages from each letter.
Like for the letter B I wrote "Be confident" and "Be calm."  And for the letter E I wrote "Enjoy life."

After the personal messages, I focused on the embellishments.  She likes tea and flowers, loves music and uses her time creatively.  Once all the little pieces were attached, it all kind of came together.

I gave it to her after her graduation ceremony, and it's been hanging on her bedroom wall ever since.  I think she likes it!

You never know what you can accomplish unless you try.  You might just discover a passion for something, or at the very least a new hobby!  So, what are you waiting for?  Go have some fun and craft!!

Saturday, August 3, 2013

You Color My World

Now that my son's wedding is past and the road trip to visit my mother-in-law has come to an end, and I have recovered from a sinus infection, I can breathe a sigh of relief and get back to crafting for pleasure!!  Not that it wasn't fun to hand-make so many things for the wedding, but it's nice to sit down to Pinterest or a crafting magazine and think, 'this looks cool, I think I want to try it', and actually have the time to do so!

I did look online at my favorite sites and blogs, and found inspiration in Hambo's newest challenge.  So I got out my trusty Copics and printed up a favorite Hambo digi image and went to play.

The image I used is called Pig Artist and comes with three sentiments!  I used the "You Color My World" sentiment on the inside of my tri-fold card.

I cut a 12x5 inch strip of cardstock and scored it at 4" and 8".  Then I cut a straight line from the first 4 " fold to a point 2 inches from the end on each side to make the diagonal shape of the card.  The point didn't work for me so I cut about 1/2" off.

Then I had fun using my stash of leftover patterned papers and covered each flap of my card.  I had to make sure to attach two eyelets and two snaps (I thought they were eyelets) before adhering the pp.

My Pig Artist image looked lost on all the colorful papers, so I cut out a circle with which to frame him. Here is my card in its open position.

I would have put a little more embellishment on the card front, but  I wanted to include it in my growing pile of cards for the Troops, which has some very specific guidelines for what you can put on your cards.

So here is my Pig-casso in all his colorful glory!  Check out the Hambo Hoedown for more inspiration on using your eyelets and Hambo images on your cards.  Each player is a winner, getting a digi image just by entering!!

And as always, crafters, have fun!!

Tuesday, July 30, 2013

I Had Fun With This One!

Today I made a card using a QKD digi image called Mermaid Braids by the lovely Maigan Lynn.
I decided to use an embossed card front that I "tweaked" by coloring the unraised parts and Stickling the raised parts (I thought these looked like waves).

I colored Maigan's mermaid with Copics, then fussy-cut her off of the rest of the image.  I adhered her to my card with dimensional tape.

To embellish, I lined up some like-colored ribbons and covered the staples I had used to fold them with a spray of flowers.  A few clear skittles add to the underwater look of my card and it's finished.

Oh, and I added a tiny starfish charm to her wrist.  Uh oh, looks like she lost an eyelash!!  Better do an emergency make-up recovery job on her before she gets mailed out!

Like what you see?  Go on over to the ALL NEW Queen Kat Designs Shop to choose your favorites!!  Tell them Pat sent you!

Monday, July 29, 2013

To Paper Piece or to Paper Pierce, That Is the Question

This week brings a new challenge from Squigglefly:

  "Challenge this week to either do a Paper Piecing or Paper Piercing....or if you are super creative, do both!"

The BandAids on my fingers tell me I am NOT a paper piercer, so I stuck to a card featuring paper piecing.

I am showcasing a July new release from Squigglefly called "Cup with Cherry" by artist Pammie Lehto.  I printed the image three times-once on card stock and twice on patterned paper.

After coloring the contents of the cup, I fussy-cut the images on my patterned paper.  One is the full cup and saucer; the second is just the cup, which I adhered with dimensional tape for a more 3D effect.  The sentiment is another separate digi from Squigglefly that I thought looked and sounded right for my card.

I embellished with a leftover sprig of flowers, a couple silk leaves and a "pebble" sticker.

Remember, if you use a Squigglefly image in the challenge, you can win a free digi!!  So get out your patterned papers or your piercing needle and come play in the Squigglefly Challenge this week!!

Tuesday, July 23, 2013

Where Did Christmas in July Come From?

According to Wikipedia, "In the southern hemisphere, winter falls in July. Therefore in countries such as Australia, New Zealand and South Africa in order to have Christmas with a winter feel Christmas in July events are undertaken.  The earliest known occasion to make the phrase Christmas in July literal was in July 1933 at a girl's summer camp in North Carolina.  The term was given national attention with the release of the Hollywood movie comedy Christmas in July in 1940.  American advertisers began using Christmas in July themes in print for summertime sales as early as 1950."

In the crafting world, it's as good an excuse as any to start my stash of Christmas cards for the holiday.  And evidently QKD is in sync with my plans, releasing new Christmas images this month as well.
Check out my card today using the QKD July release, "Swirl Deer."

I decided to try a gate-fold card--amazing that I'd never made one before, but true!!  Once I picked out the patterned papers from my Christmas stash, I printed my image on white cardstock and inked the background with Tim Holtz Distress Inks (Worn Lipstick, Bundled Sage and Gathered Twigs).

I found the sentiment in my Christmas box and inked it to coordinate with my image, then attached them to opposing sides of my card.  The star is from my button collection.

I put a little shimmer on my deer's antlers with black Stickles, but otherwise left my card Clean And Simple.

Ready to tackle Christmas cards yet?  The QKD Shop is your go-to place!!  Not ready yet?  There are plenty of stamps and digi images just released--go check them out!!

Saturday, July 20, 2013

T MINUS SIX DAYS AND COUNTING

My son's wedding to celebrate the sacrament of marriage is coming up this Friday.  My new daughter-in-law, co-mother-in-law, daughter and I have been very busy!!  We are all crafters (I love that he is marrying one of "my kind."

Cami, my DIL, has made all the centerpieces, the bridesmaids bouquets and the Table Numbers.  Her mom has made all the rest of the flowers, and made some amazing cards and favors for the shower.  I have been busy making the following items for this event:

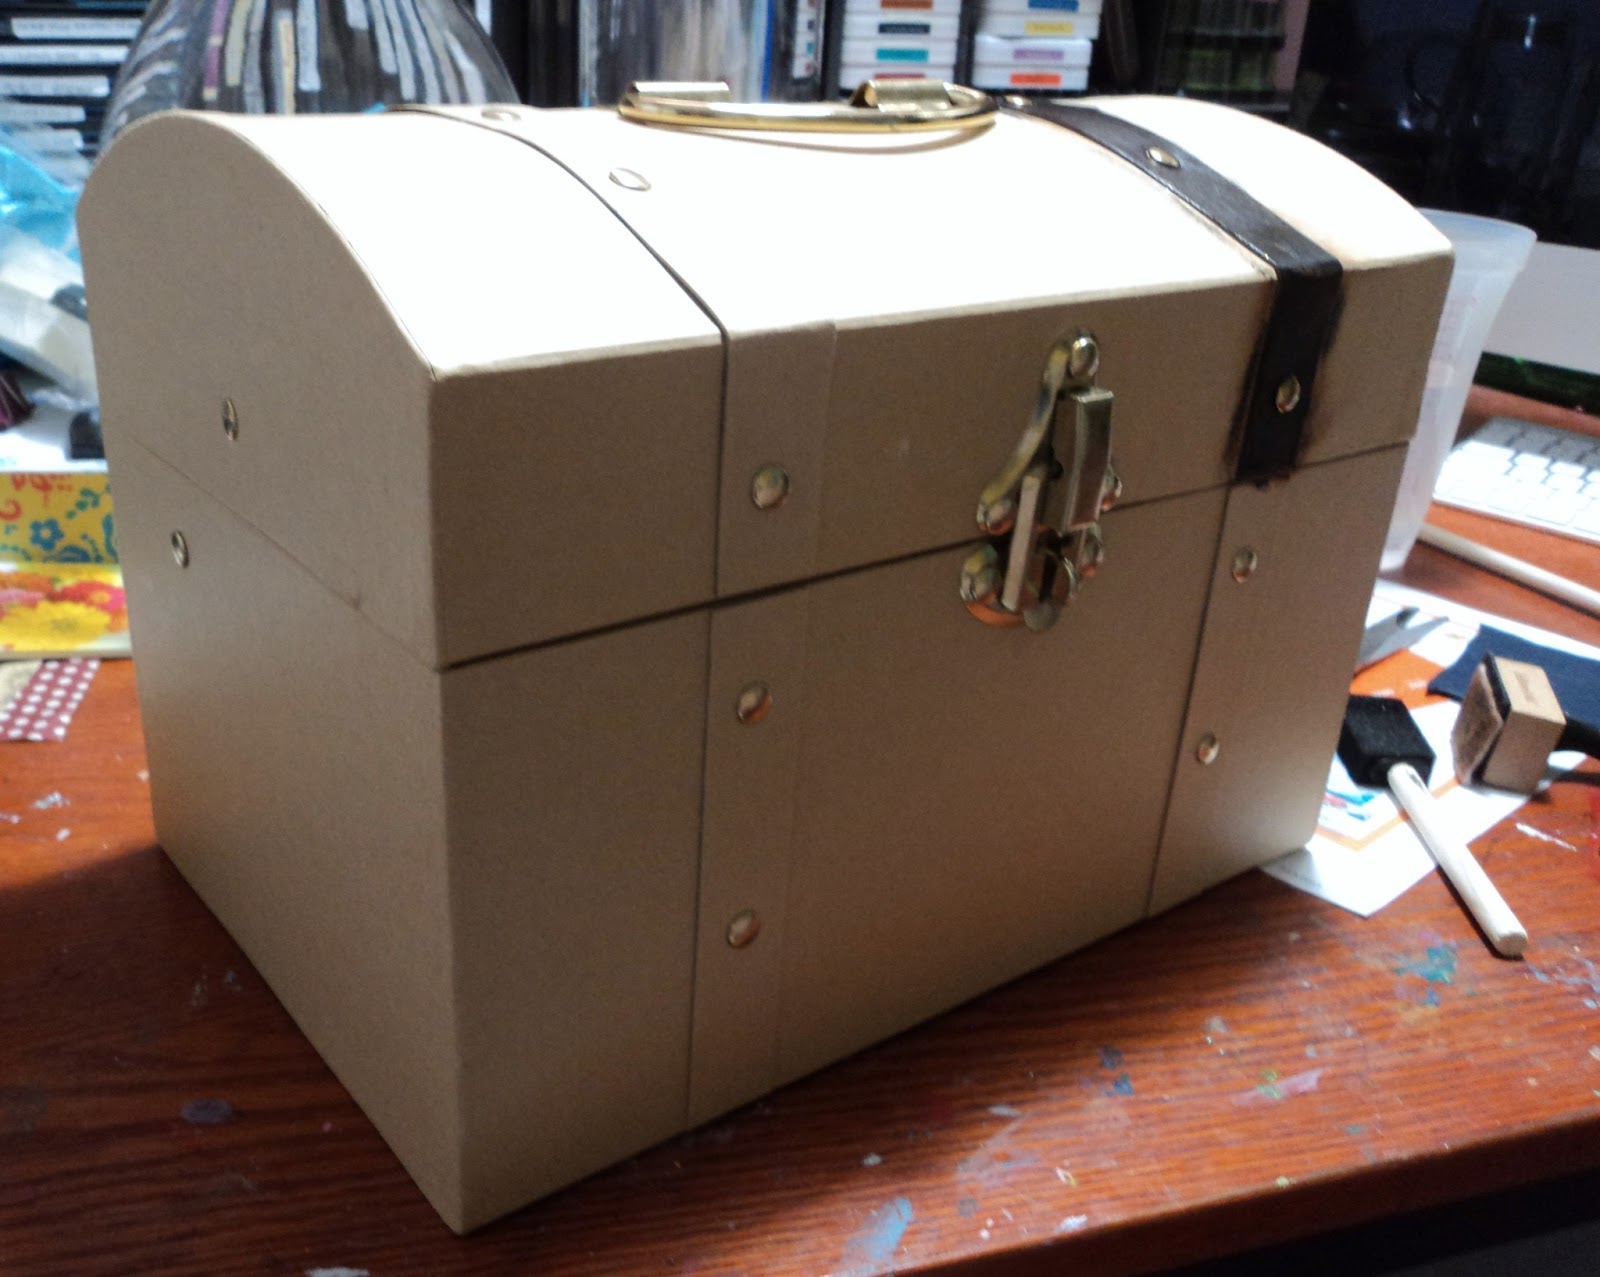
I bought a paper mache chest for the cards that guests will drop into the box.  Using black acrylic paint, distressing it while still wet, and rubbing some Tim Holtz distress inks, I gave the "straps" on the chest a leather look.

I used patterned papers and Mod Podged them onto the chest, front, back sides and bottom.  I used black ink and rubbed it onto the edges for an aged look.

I also distressed the brads and lock with inks and distress embossing powder.  Then, since the wedding has a tropical theme, I added a couple star
fish, and before gluing the box partially open, I attached
strings of pearls hanging out of the chest.

Another project I finished was the ring bearer's pillow.  Nothing more than to hot glue another large star fish onto the pillow and tie ocean charms onto the ends of the ties.
I think I previously posted the boutonnieres for the groomsmen, but here's where my daughter's help came in.  I made the prototype and she put them all together.  Here's a photo of the boutonnieres with a "steal of a deal" from Hobby Lobby.

The starfish decoration was on 80% clearance.  Both were colored purple, which is the bride's favorite color (her sash is called regency Purple) and is mounted to a piece of white-washed wood.

I placed the boutonnieres in small white boxes and tied them up with lace (like the guys will appreciate that touch).
I'm still working on the tent cards that will become Table Assignments.  Each card base is a different set of colors depending on the entree choices of the guests.  Their name and table number will be printed on the front.  All that's left for me to finish these is the actual table assignments, which I hope we work on this weekend!

I'll have more pictures next weekend!