PagesPat's Ponderings

Showing posts with label upcycling. Show all posts

Tuesday, July 22, 2025

Time's Fun when You're Having Flies


I went to an estate sale and found a few garden frogs to color. The only thing I like better than frogs are mushrooms, but I also spied some garden birds. The whole lot cost me $5 and I've just finished the first five of the ten frogs I found.

The first frog I painted and named George. I placed him under a trio of very large mushrooms growing in my neighbor's yard across the street. He's catching some shade in the summer's heat today. He is only 3 inches high, but mercy, look at the size of those mushroom caps!! If they were edible, they would have been in my frying pan and eaten already...

I painted another four frogs and placed them on the steps of my front deck. Arranging them from top to bottom, they seem to be looking and moving toward the front lawn. The next frogs I paint I plan to place them across the ramp that runs the width of my house, up against the deck. The ramp is no longer in use so I'm putting a caution tape across the ramp (temporari;y). I also bought a brass garden sign that warns visitors that the area is a "frogs crossing area" that you can see between the deck and the ramp. I have more frogs to color, which will end up  in the small garden surrounding the lamp post across the yard.

I used acrylic paints; Posca paint markers for the detailed work. Next up will be the birds, but first I've got a big garage sale for which I've been decluttering. I need to price all the craft supplies I'm letting go of (and whatever else I toss into the for sale pile) in just 2 weeks---YIKES!!'

Monday, December 2, 2024

On the Second Day of Christmas Crafting...


This piece caught my eye at a thrift store. When I go to garage sales and thrift stores, I see what things could be after altering. Do you? This was rusted and ugly and had no backing, but I saw it in my mind with new paint and a pretty winter scene hanging behind it.

Giving new life to this old card holder was fun. The copper acrylic paint looks good and I created a backing out of foam board to fit the circle. A ribbon and bow finishes it off and I'm ready to add cards to it. Um, does anyone still snail mail holiday cards out?... 

Sunday, March 5, 2023

Only 240 Days until Halloween

 Today I started working on my Halloween Decor for a Fall Craft Fair. I mean, it's not too early - there are only 240 days until the Big Night. I found myself in Michaels last week and my store still had Christmas items on clearance! Everything was 90% off, and when I found these Christmas calendars, I grabbed all they had - which was only three, but it's a start. And they were only $2 each! Here's what they looked like before I waved my magic wand over them:

I know, they're very cute...for Christmas, but my mind is channeling Halloween, so the first thing I did after removing the plastic packaging was to paint the whole thing black.
Two hours later, I placed my first Halloween decor of 2023 on my bookcase. I can't wait for my daughter to see it. Originally there was a small wooden Christmas tree on a peg and attached by string. The idea was to place the tree in the holes on top of each layer to count down the days before Christmas.
I ran into a problem with the calendar part because there are only 24 days counting down to Christmas, but a 30-day countdown for Halloween! I tried to drill more holes to keep it as a calendar, but the wood started to crack. So now it's just a fun decoration to put up in October.
After painting each of the three layers black, I transformed the houses you saw in the first photo into headstones. Of course, I had to put punny phrases on them.  Going with the graveyard theme, I added skeleton parts, leaves, pumpkins, etc., on top of the head stones. The second layer bore the pumpkins, more leaves, s juicy spider and a light post I had bought after last year's Halloween. I found Halloween Cat stickers and created a (sort of) 3D effect for it. More leaves and pumpkins finished that middle layer.
The top layer was so slanted I decided to add some bats to the front, and a few Halloween miniatures. I finished it off with some spider webbing. It looks great in person. I want to do the next holiday-themed flip for children, not too scary, more fun.
Anyway, that's my story and I'm sticking with it. I have 2 Halloween shadow boxes and a wreath leftover from last year to add to my craft fair inventory. Tell me what you think (please)!

Challenges I am Entering:
The Fairy and the Unicorn - Anything mythical/fantasy Goes
Creative Artiste - Anything Mixed Media Goes
Two Old Bats Halloween - Anything Halloween Goes


Wednesday, December 19, 2012

Letters FROM Santa

Trying to pump out a few more handmade presents this Christmas, and came up with one for my granddaughter Bella.  She's back in our lives after paperwork for immediate temporary visitation was served to her mommy.  We may not have her for Christmas (this year) but we have her for this coming weekend, and there's a Christmas brunch tomorrow, so she may get a couple presents early this year.

So I colored up a Queen Kat Designs stamp from artist Sandra Caldwell called Silly Santa.  I decorated (minimally) a Quaker Oats canister and popped the image on the top and made my Bella a game I call "Santa's Letters".  Inside are tons of letters, from A to Z and back (several times) again.  She is in Kindergarten and loves to spell words and read.  We will have so much fun with this game, sorting letters, piling capital letters separate from small letters, and spelling words!
I love using QKD stamps for more than cards--altered art, gift boxes, ornaments!!  You can see the wide range of stamps QKD offers HERE
 From now until 12/24 12, QKD is having a special sale called Reindeer Games.  


Friday, August 17, 2012

Upcycle Blog Hop Today!

Today I am art of the August Upcycle Blog Hop.  If you haven't come here from Amanda's Blog, you might want to start at the beginning so you don't miss out on some really cool projects. We have Scrapbook Stamp Society sponsoring us today. They are giving away 3 free digi stamps. Our hostess, Shannon Leffew, will also be giving away a set of flowers from her Etsy store that you can visit here
Growing up in the seventies (and I mean being a teenager), I was on the "cutting edge" of recycling consciousness.  I and my girlfriends started our own environmental organization, cleaning up the sides of roads, carting glass and cans "way out" to Gurnee, and even publishing our own Recycling Craft Newsletter.
We Xeroxed and distributed educational brochures to any who would take them, and started writing campaigns against companies whose industrial smoke and waste were killing the environment.
Of course, this is before cities started jumping on the curbside recycling collection bandwagon, before auto emissions testing, before manufactured goods were made with recycled products.  I truly feel that I and my friends helped to push legislation that protects the environment today, all because we cared enough to educate people, blow whistles and we weren't afraid to do some clean-up ourselves...as teenagers.
So, while cruising Pinterest last month, I actually saw an upcycling project that I had written about in our "Campaign Against Pollution" newsletters "back in the old days".  I decided to choose it as my upcycling project for today's blog hop, because life, my friends, is an unending circle, and I am about to repeat myself, although it's taken almost 40 years to do so.
Pictured here are several styles and sizes of handmade notebooks I've made from pads of paper, PostIts, even a Steno pad.  They're covered with food containers made out of cardboard and cut to size to make cool covers.  Of course, I added embellishments like lace, adhesive jewels, ribbon, bows, flowers and fibers.
The nicest thing about my project is that what was "far out" in the seventies is "cool" today.  I know this because my teenage daughter had friends over last night, and when I showered them with a collection of these notebooks, they all grabbed their favorites.  One likes tea and chose the Lipton-covered notepad with the lace, while another liked the flower-embellished Rice-a-Roni notepad.
Now on to another blog, with another great idea to "Reuse, Recycle and Reduce", making trash into treasure.  Before you continue on, please take a moment to leave a little love.  Just click HERE when you're ready to hop!!
and if you get lost on the hop, come back to check out the hop order here:

Monday, July 9, 2012

Crafters' Companion Anything Goes Challenge

Who doesn't love an Anything Goes challenge, especially from a great company like Crafters' Companion?!  I love, love, love what I did with this challenge, and I hope you will too!

I have been experimenting with mixed media lately, and today I took it to the next level, upcycling a rummage sale find into craft room decor.  And the bonus is that it serves as an organizational tool!  I can store little doodads by color, or hide little bottles of Stickles, or a hundred other little things.

So let me show you how I got from this: 


To this:

The first thing I did was to use my manly skills and sand the wood smooth, getting rid of all the old nasty paint, dust and dirt.

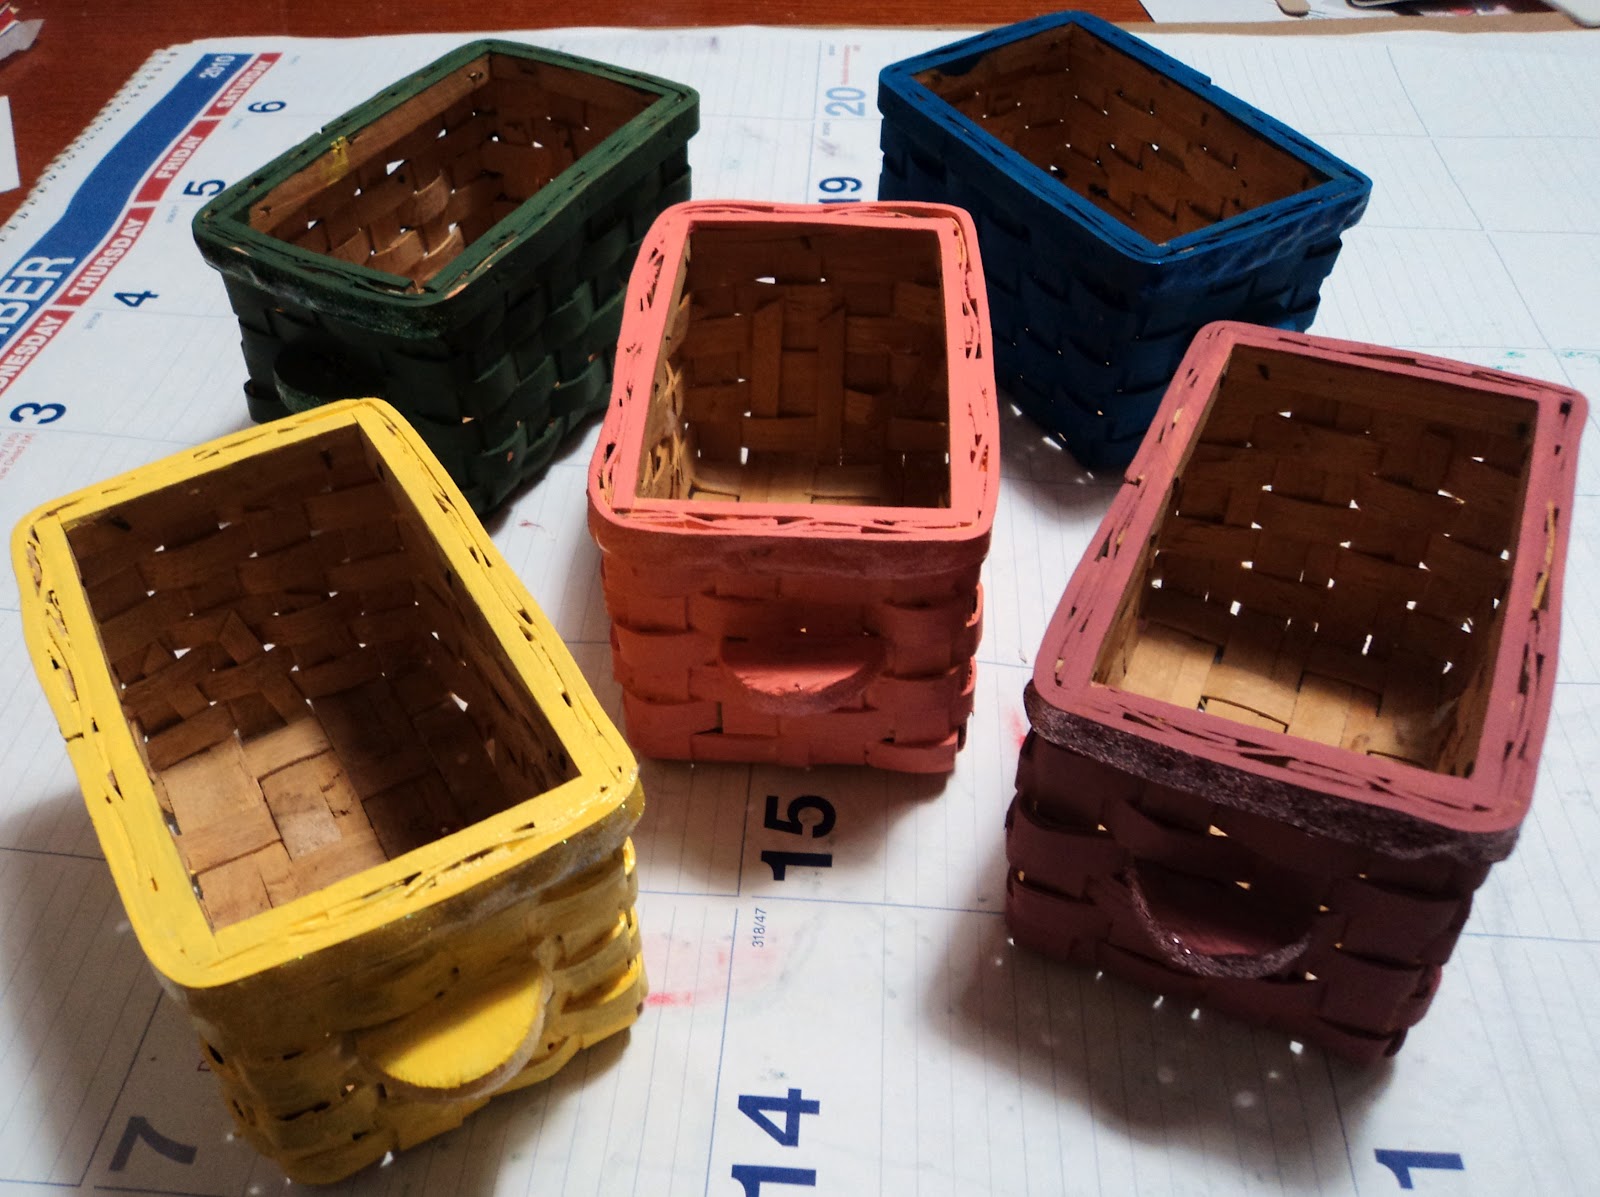
While letting my pot of creativity simmer in my head, I used acrylic paints and gave all the baskets a splash of color.  That wasn't enough, so I added some Stickles on the front and the handle.

At first, I had thought to paint the wood a dard color and try out my new bottle of Tim Holtz Crackle Paint.  But I wanted something a little more crafty.

So I painted the wood white, and started to use ModPodge to decoupage some patterned papers onto it.  There was an assortment of papers, but what I finally decided on was the red roses paper.  It was a steal of a deal, a "book" of wrapping paper for only $2!!  I have the tiniest amount of this one pattern left over, after lavishly tearing and gluing it onto my new storage bin.

Besides the paint, the glitter and the patterned papers, I used a red paper doily to frame the first of my Crafters' Companion stamped images.  She's a fairy from the Fairyopolis Autumn collection.  
Just like the patterned papers, I slapped some ModPodge onto the surface and stuck the doily and then the image on, then painted more ModPodge over it all.

I did the same with the next stamped image, a cute little fairy from the Fairyopolis Spring collection, without the doily frame.  I added some tiny Prima flowers all over the top of my box, along with bits of Stickles here and there.

I thought I was finished, but after putting the baskets in their slots, it didn't look right.  So I pulled out my acrylic paints and splashed some red on the front of the box.  While my brush was still wet, I swiped some strokes into the top of the box and the edges.

And that took me to the ends of my box, the "sides. I couldn't help it, I had to use a favorite image from the Humphrey collection, called Best Friends.  I SO love Humphrey.  If I had the money, I would own them ALL!  Mwahahahaha!!

And now my project is complete, dry and placed strategically in my craft room.  I've been doing a lot of cleaning out and organizing in there, and I am making headway.  I finally discovered the best way to store my cling stamps, at least for me.  I got a bag full of cd cases, the thick kind.  Once you pop out the cd holder, it fits quite a few stamps.I bought four CD stands from our local church's rummage sale this year, and am in the process of placing them all in the cd cases.

So here's what my crafting table looks like now, complete with my upcycled shelf of baskets.  I still haven't decided whether or not to keep the box frames on the wall, but for now they make good storage and don't take up any table room!!

Keep cool, everyone, and keep crafting, and if you've a mind to it, go on over to the Crafters' Companion Challenge Blog for inspiration and a chance at some awesome prizes.